This post may contain affiliate links. Please read my disclosure policy.
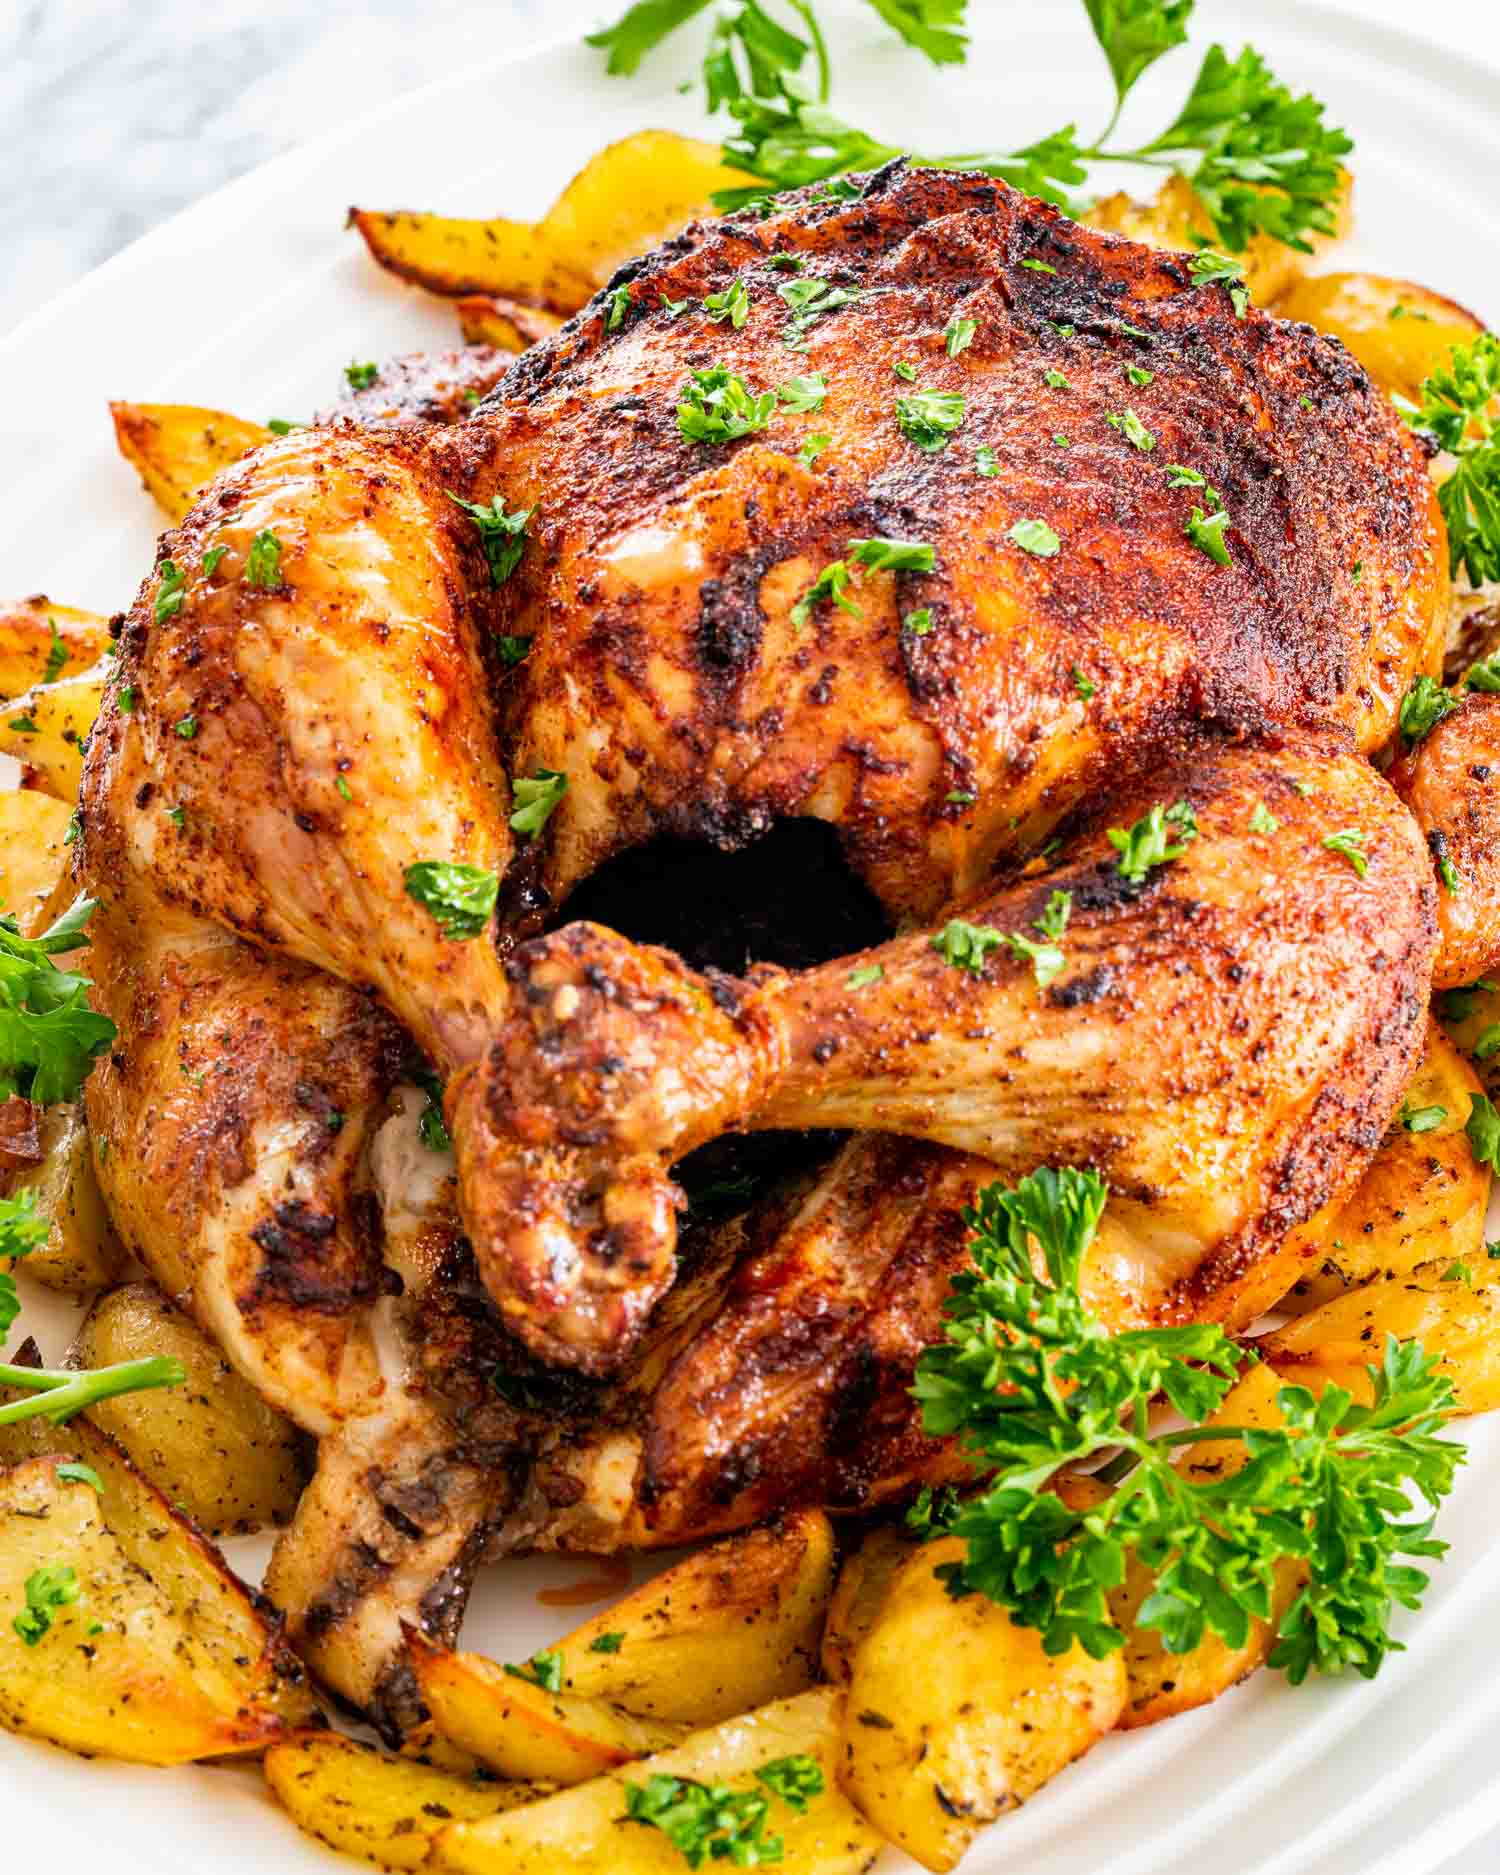
Learn how to make the best Roast Chicken recipe! Fear not with this simple rotisserie-style spice blend and step-by-step instructions that will give you juicy and flavorful chicken with perfectly crisp skin every time.
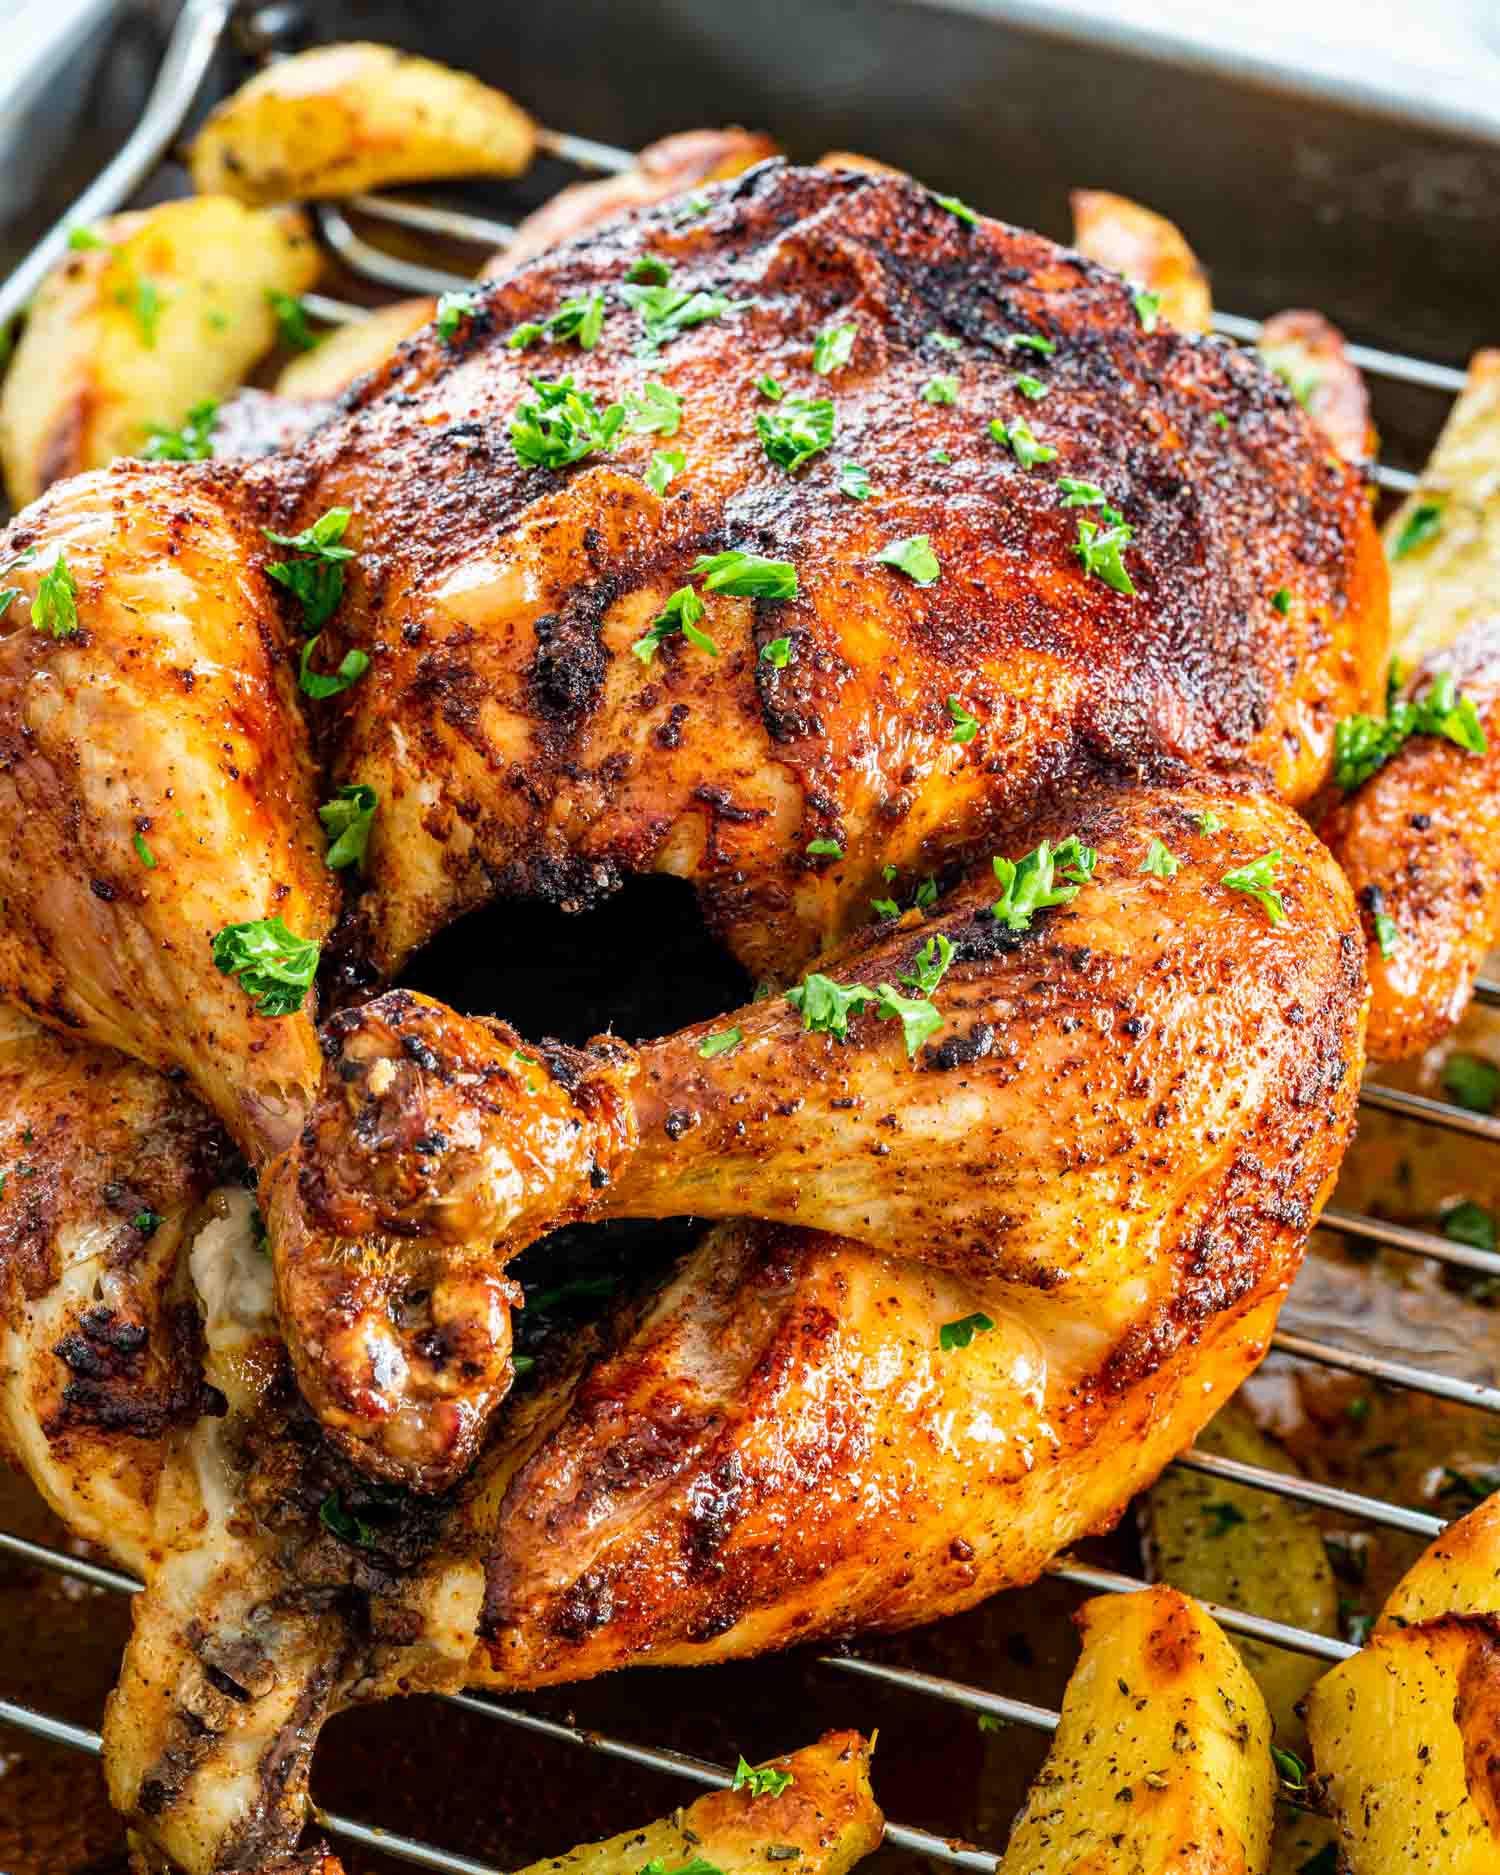
A Classic Roast Chicken Recipe
This recipe uses very simple ingredients that you probably already have in your pantry. If not, you’ll be able to find them easily and cheap at your local grocery store. With only 5 ingredients paired with a tried and true method, you’ll be a chicken roasting master with your very first stab at this recipe.
I’ve spent years and years testing different methods for roasting a whole chicken. There are lots of methods out there with a big list of steps and a giant mess, and this is not one of them. I found that with the right simple blend of flavors and this easy-peasy method, I always get chicken that tastes restaurant quality with minimal cleanup at the end.
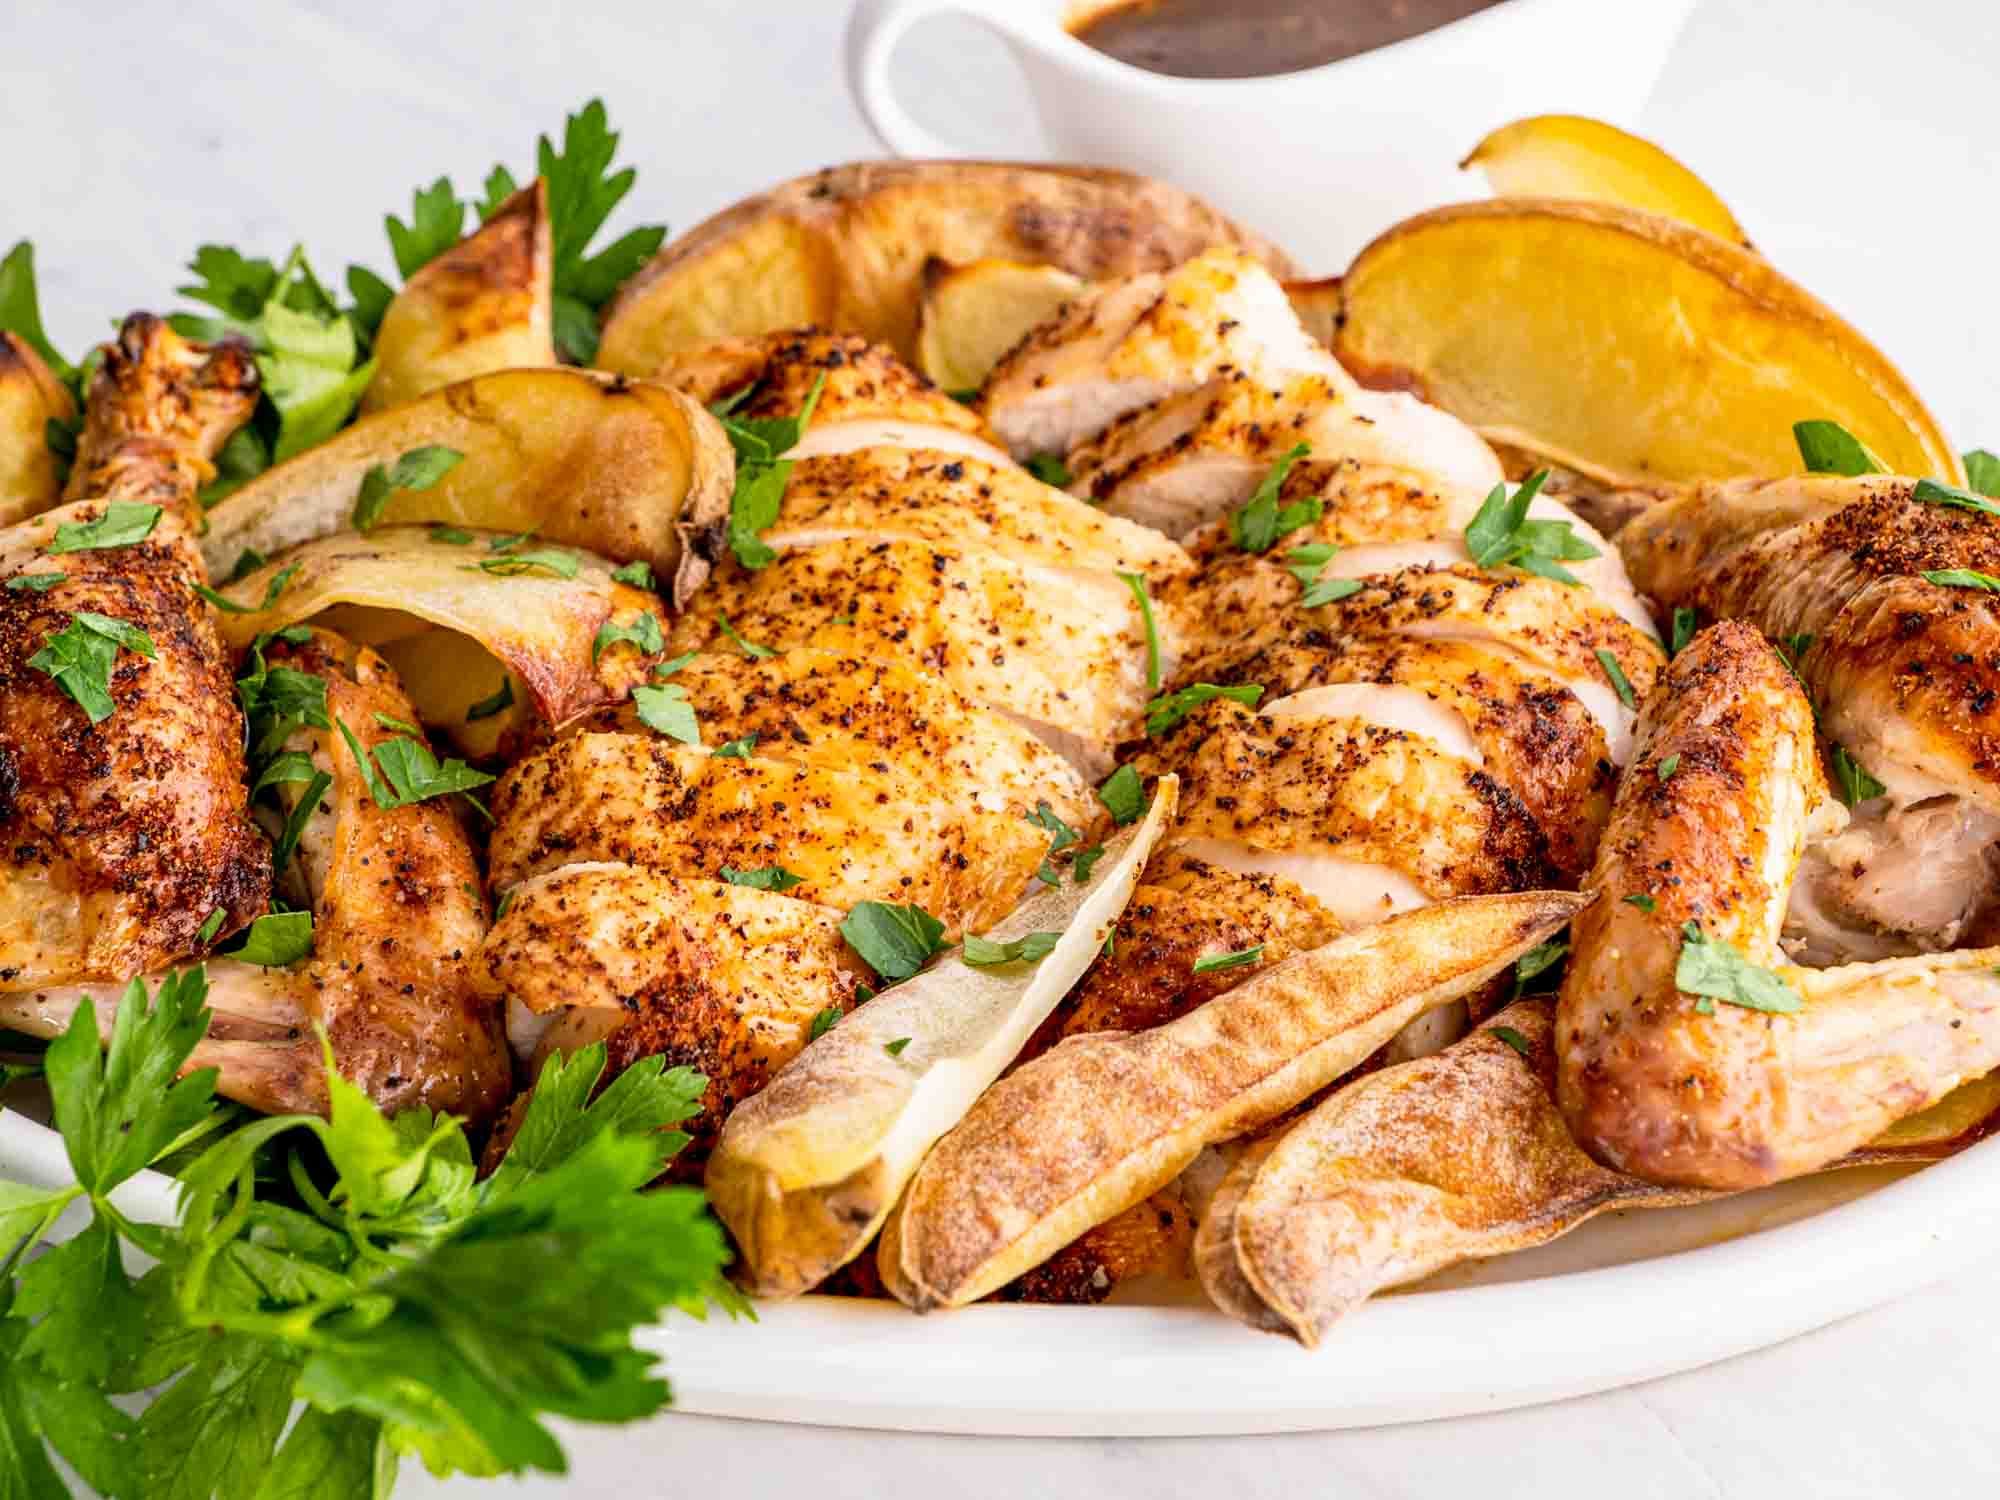
Why You’ll Love This Roast Chicken Recipe
- Easy Recipe! This simple 6-ingredient recipe only requires a whole chicken, a handful of easy to find spices, and a roasting pan to make a super flavorful roasted chicken.
- Tasty Tender Chicken! My roasting method and rotisserie-style spice blend have been perfected through years of practice and the results are unbelievably delicious.
- Healthy Meal Prep! Roast a chicken for dinner or plan ahead for meal prep. It’s a fantastic healthy protein option that stores well in both the fridge and freezer.
Before Starting You’ll Need
Roasting Pan With A Rack – Before you begin you’ll need a 11×15-inch roasting pan, preferably with a rack. If you don’t have one with a rack, you can also use a rimmed sheet pan or a large oven-proof skillet such as a cast iron.
Instant-Read Thermometer – This is the only way and the safest way to tell when your chicken is properly cooked.
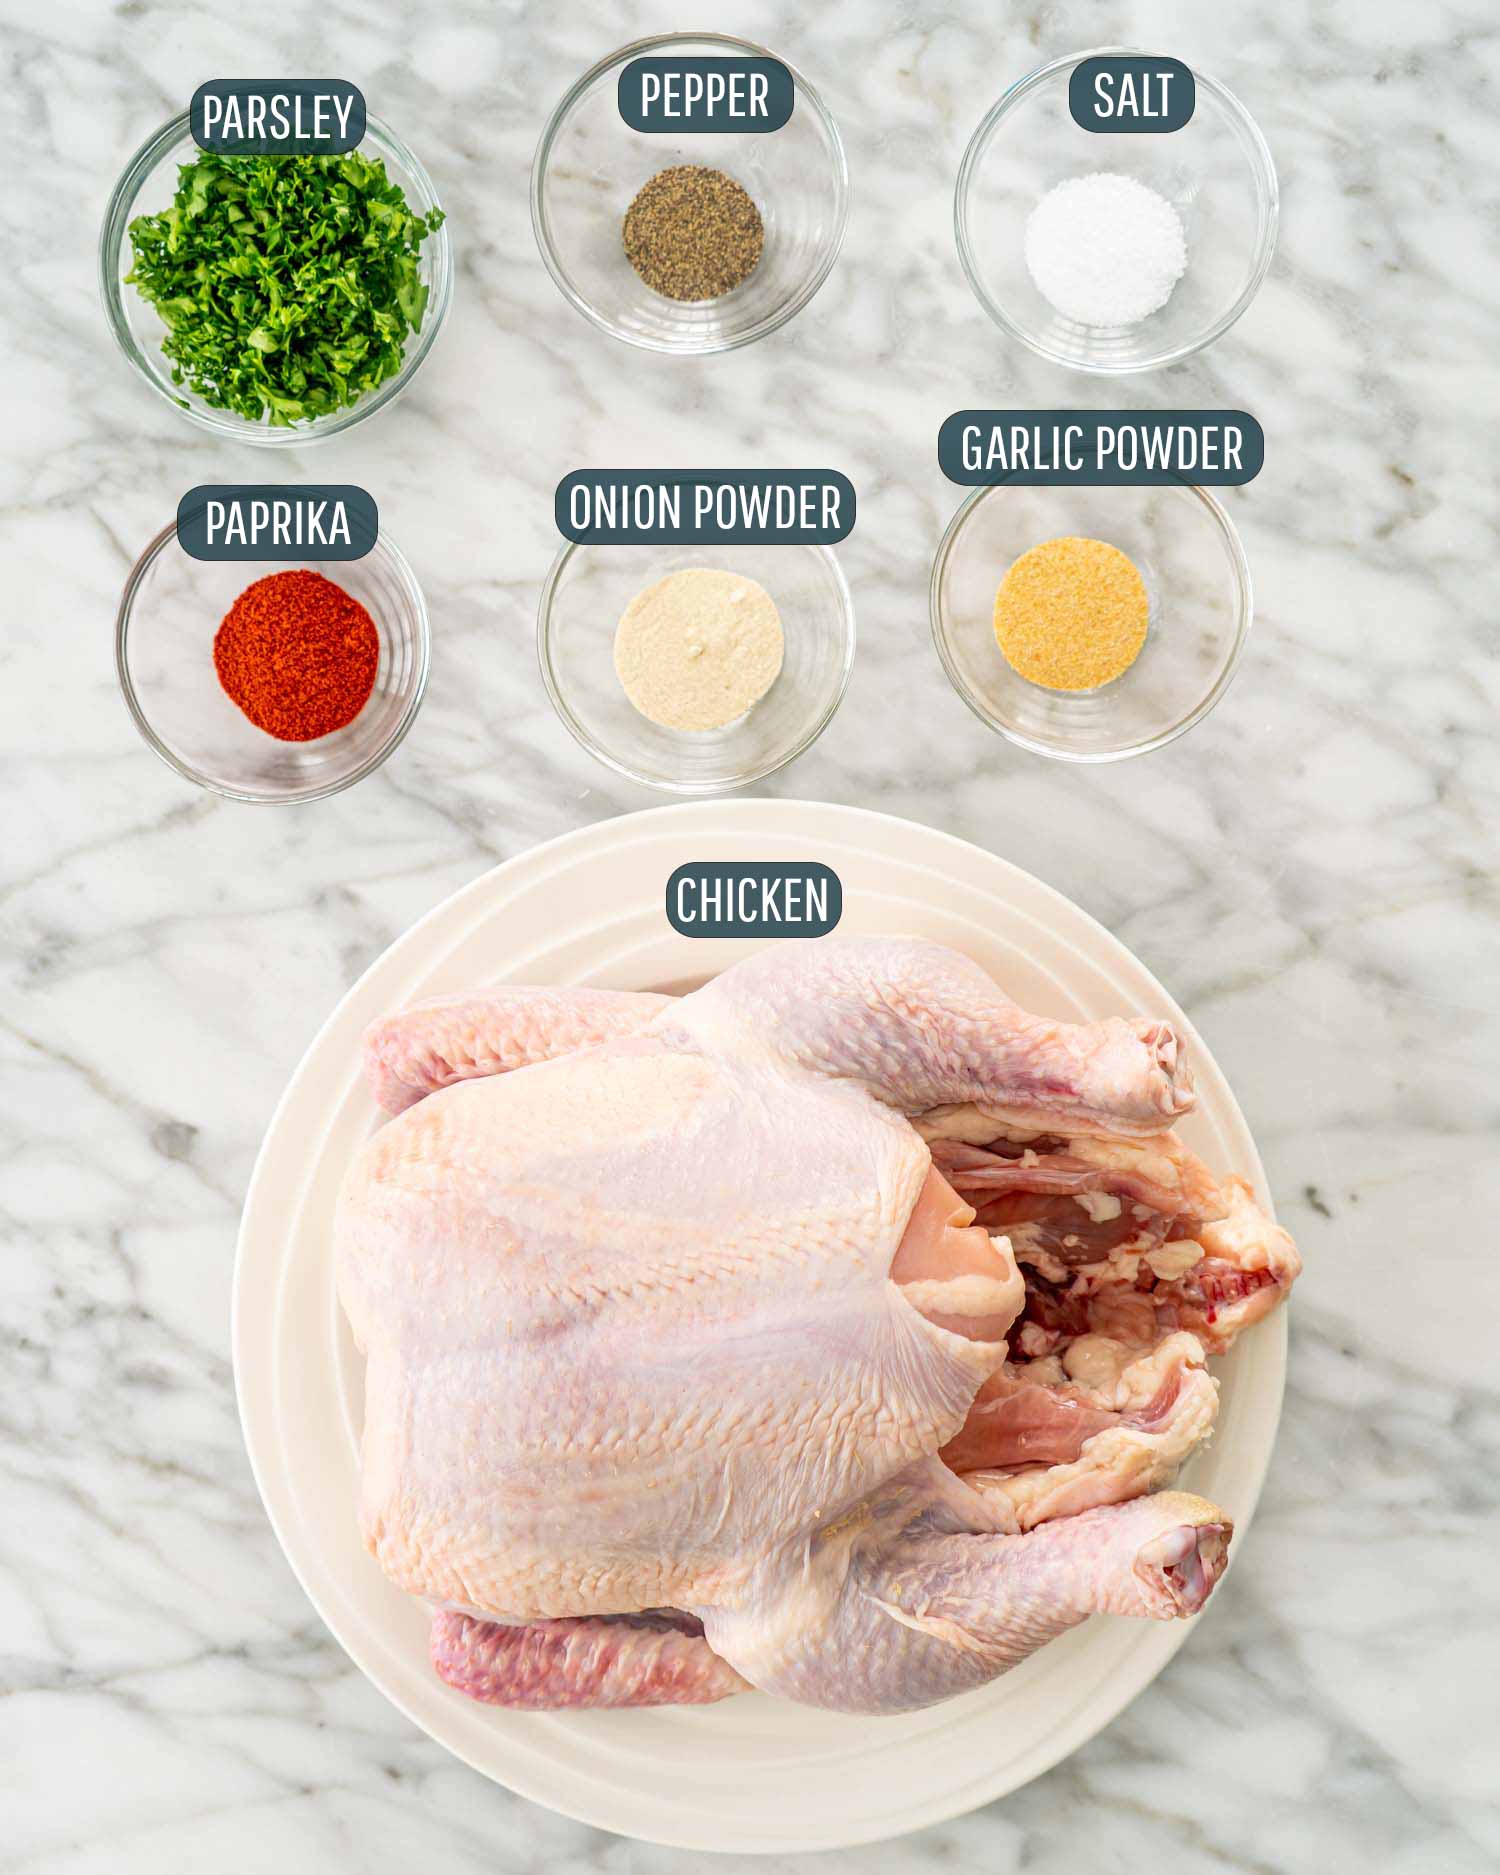
I kept this recipe nice and basic. There are so many different ways you can spice up a chicken, but I know you’ll be pleasantly surprised with how flavorful this simple spice blend is! Keep scrolling for the full recipe and ingredient amounts.
- Whole Chicken – I used a 4 pound chicken, but whatever size you have will work. If your chicken is bigger, you can up the amounts called for the seasoning. Make sure to pat it dry with paper towels before seasoning.
- Salt And Pepper – It’s important to have enough salt to ensure your chicken doesn’t taste bland. You can use as much or as little as you like. If using kosher salt, substitute half as much table salt for kosher salt.
- Onion And Garlic Powder – When we’re looking for a nice crisp skin, powders work better than fresh. This way you won’t end up with charred bitter garlic.
- Smoked Paprika – This is the secret weapon! Once you try this smoky flavor, you’ll never want to go back to regular paprika.
- Fresh Parlsey – I like to add some nice chopped herbs at the end not only as garnish, but it adds such a wonderful fresh flavor to finish off the chicken. Other herbs that go well with chicken are fresh thyme, sage, oregano, marjoram or tarragon.
Let me show you how easy it is to roast chicken at home! In just a few simple steps you can have perfectly cooked moist and juicy chicken with minimal effort.
To begin, you need to preheat your oven temperature to 350°F (177°C) so that it is already hot once your chicken is ready to cook. Then grab an 11×15-inch roasting pan with a roasting rack and set it aside for a later step. However, if you don’t have a roasting pan you can also use a sheet pan.
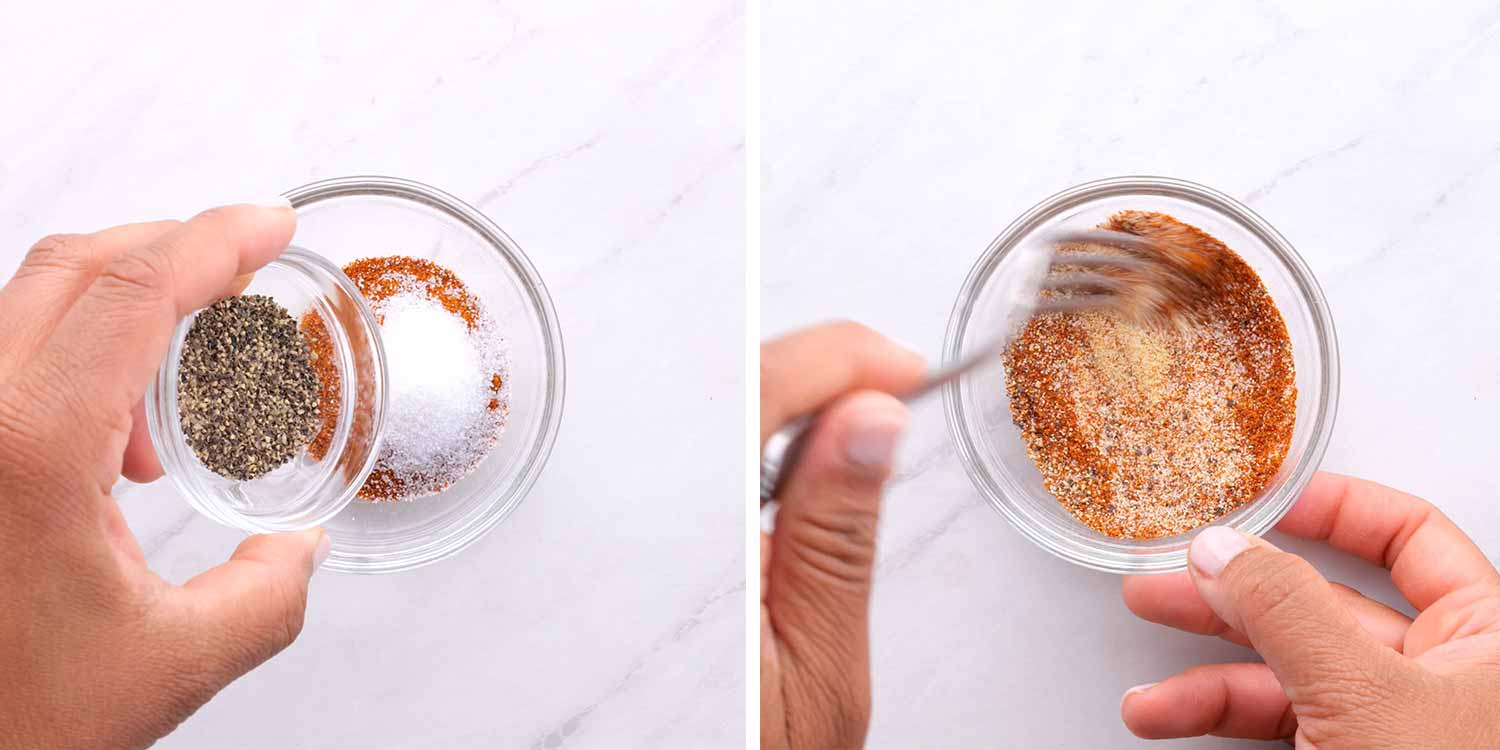
Next, you need to make the flavor packed spice rub! Just mix the onion powder, garlic powder, smoked paprika, salt, and black pepper together in a small bowl. It’s important to premix the spices for the best flavor. If you just sprinkle them on the chicken one by one it’s not the same.
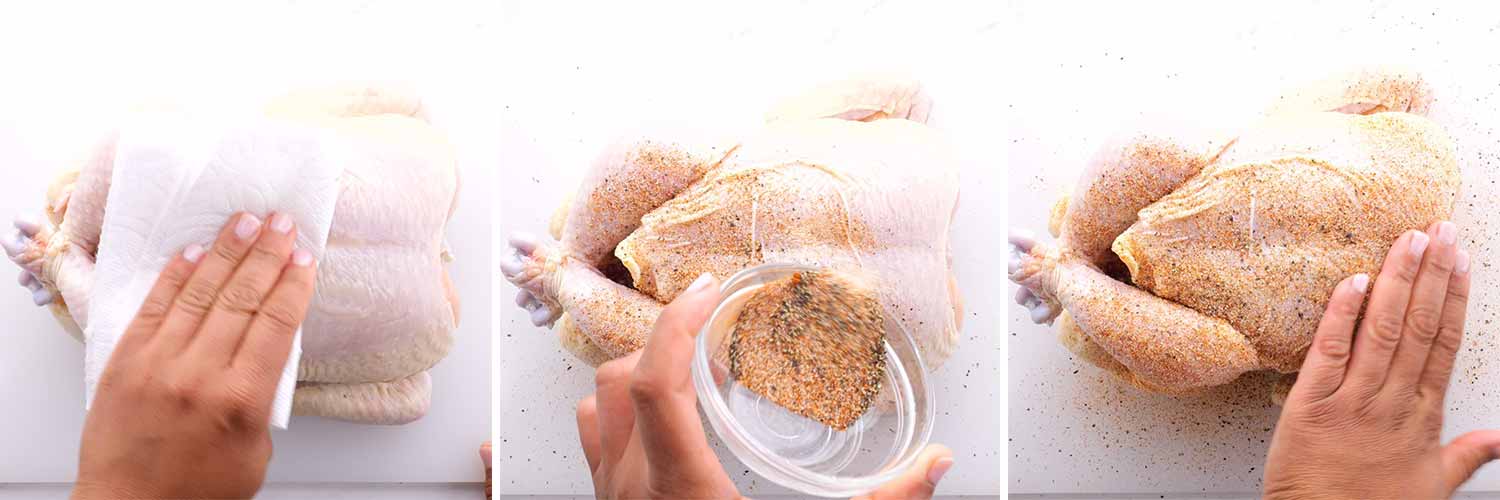
Before you even think about seasoning the chicken, you need to pat it dry with paper towels. This simple step will ensure that the spice rub sticks to the chicken. At this point, you can also remove the wing tips if you prefer.
Now it’s time to spice up the chicken with the tasty rub! To do this, use your hands to fully coat the chicken with the spice mixture. And don’t forget to season inside the cavity as well for the most flavorful meat.
Also, once the chicken is coated in spice, you can rub a bit of olive oil over the chicken to help crisp up the skin if you like. However, I find that it’s not necessary to add the oil because the chicken is roasted at a higher temperature for the last few minutes which does a great job of crisping up the skin.
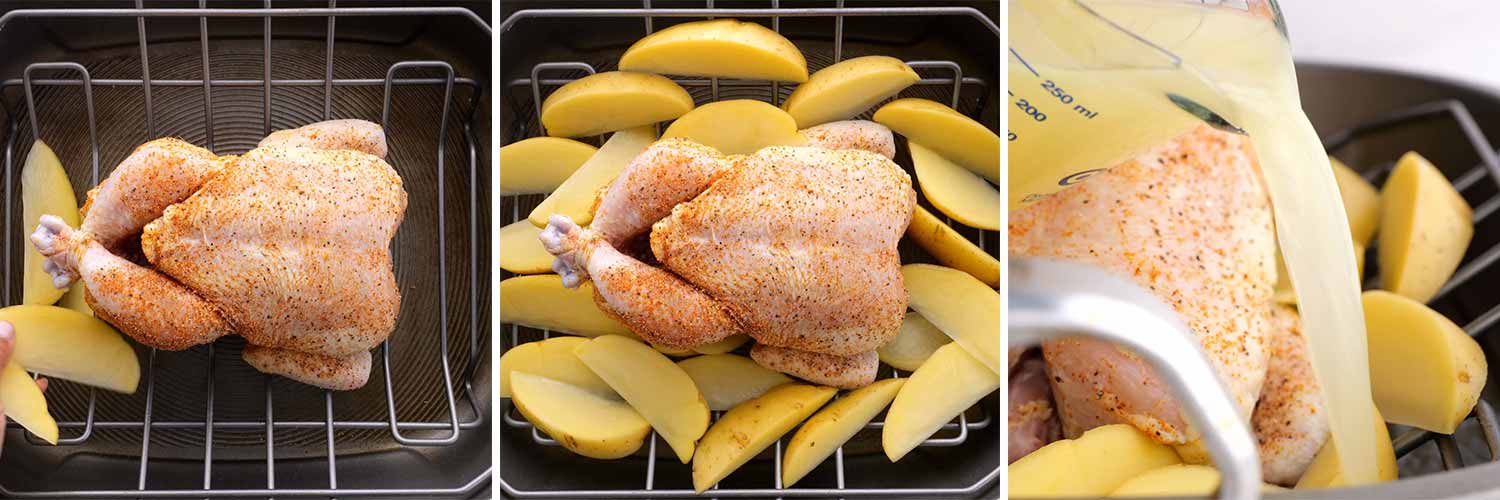
With the chicken seasoned, place it on the rack over the roasting pan. Then if you like, you can also add some potato wedges to the rack along with the chicken. This step is totally optional but is a great way to turn this roasted chicken recipe into a complete meal. And other vegetables can be added as well. I often like to add an onion cut into quarters along with some carrots.
If you want to make some gravy, now is the time to also add about a cup of chicken broth to the pan.
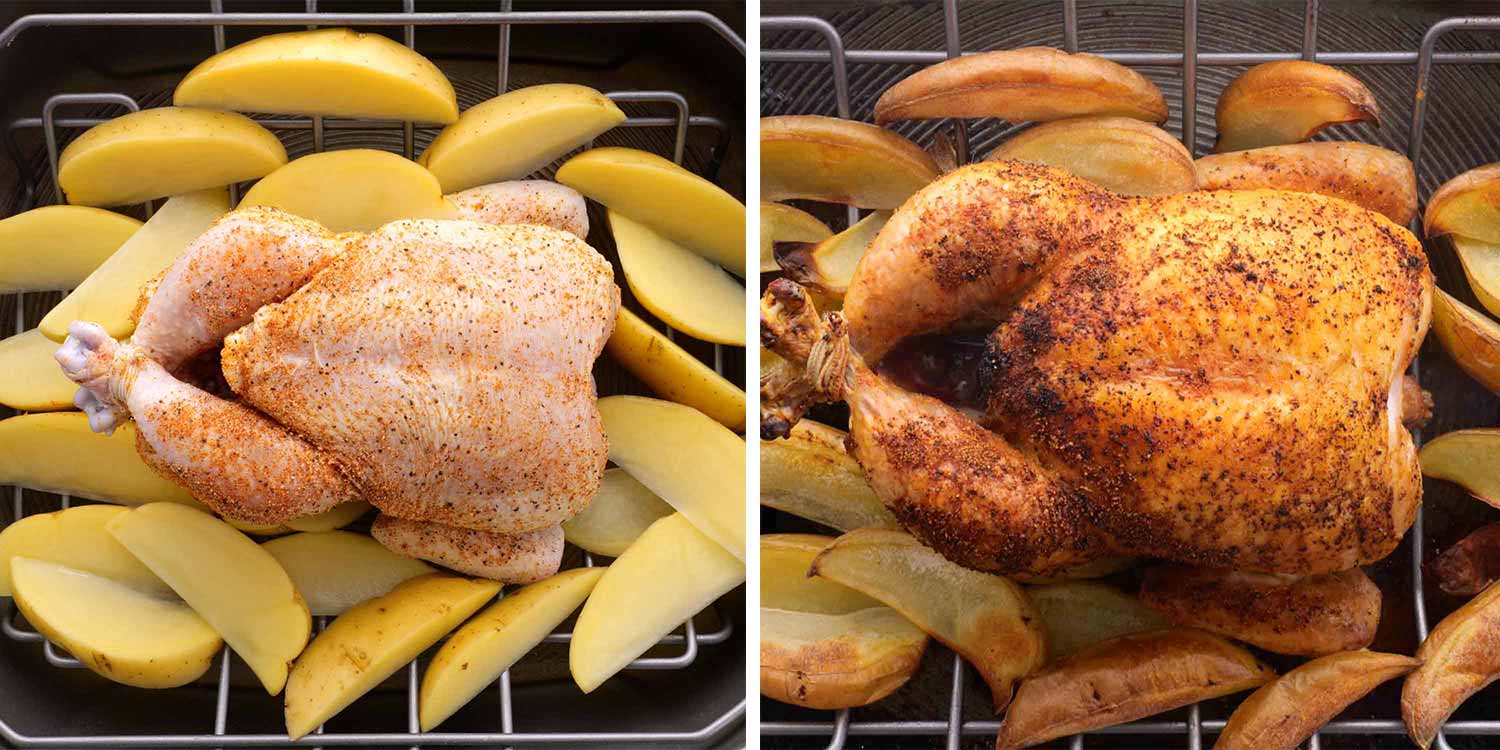
Your prep work is done! Now for the easy part. Transfer the chicken to the oven and bake it for 20 minutes per pound. Then increase the oven temperature to 450°F (232°C) for the last 20 minutes of baking to crisp up the skin. So for example, you would cook a 4 pound chicken for 60 minutes at 350°F (177°C) and then for an additional 20 minutes at 450°F (232°C).
Now that the chicken has been roasted, it needs to rest for a bit. Cover it with a bit of aluminum foil and allow it to sit for 10 to 15 minutes before slicing. Waiting a few minutes ensures that the meat stays nice and juicy. All the juices will run out and make the chicken dry if you slice into it too soon.
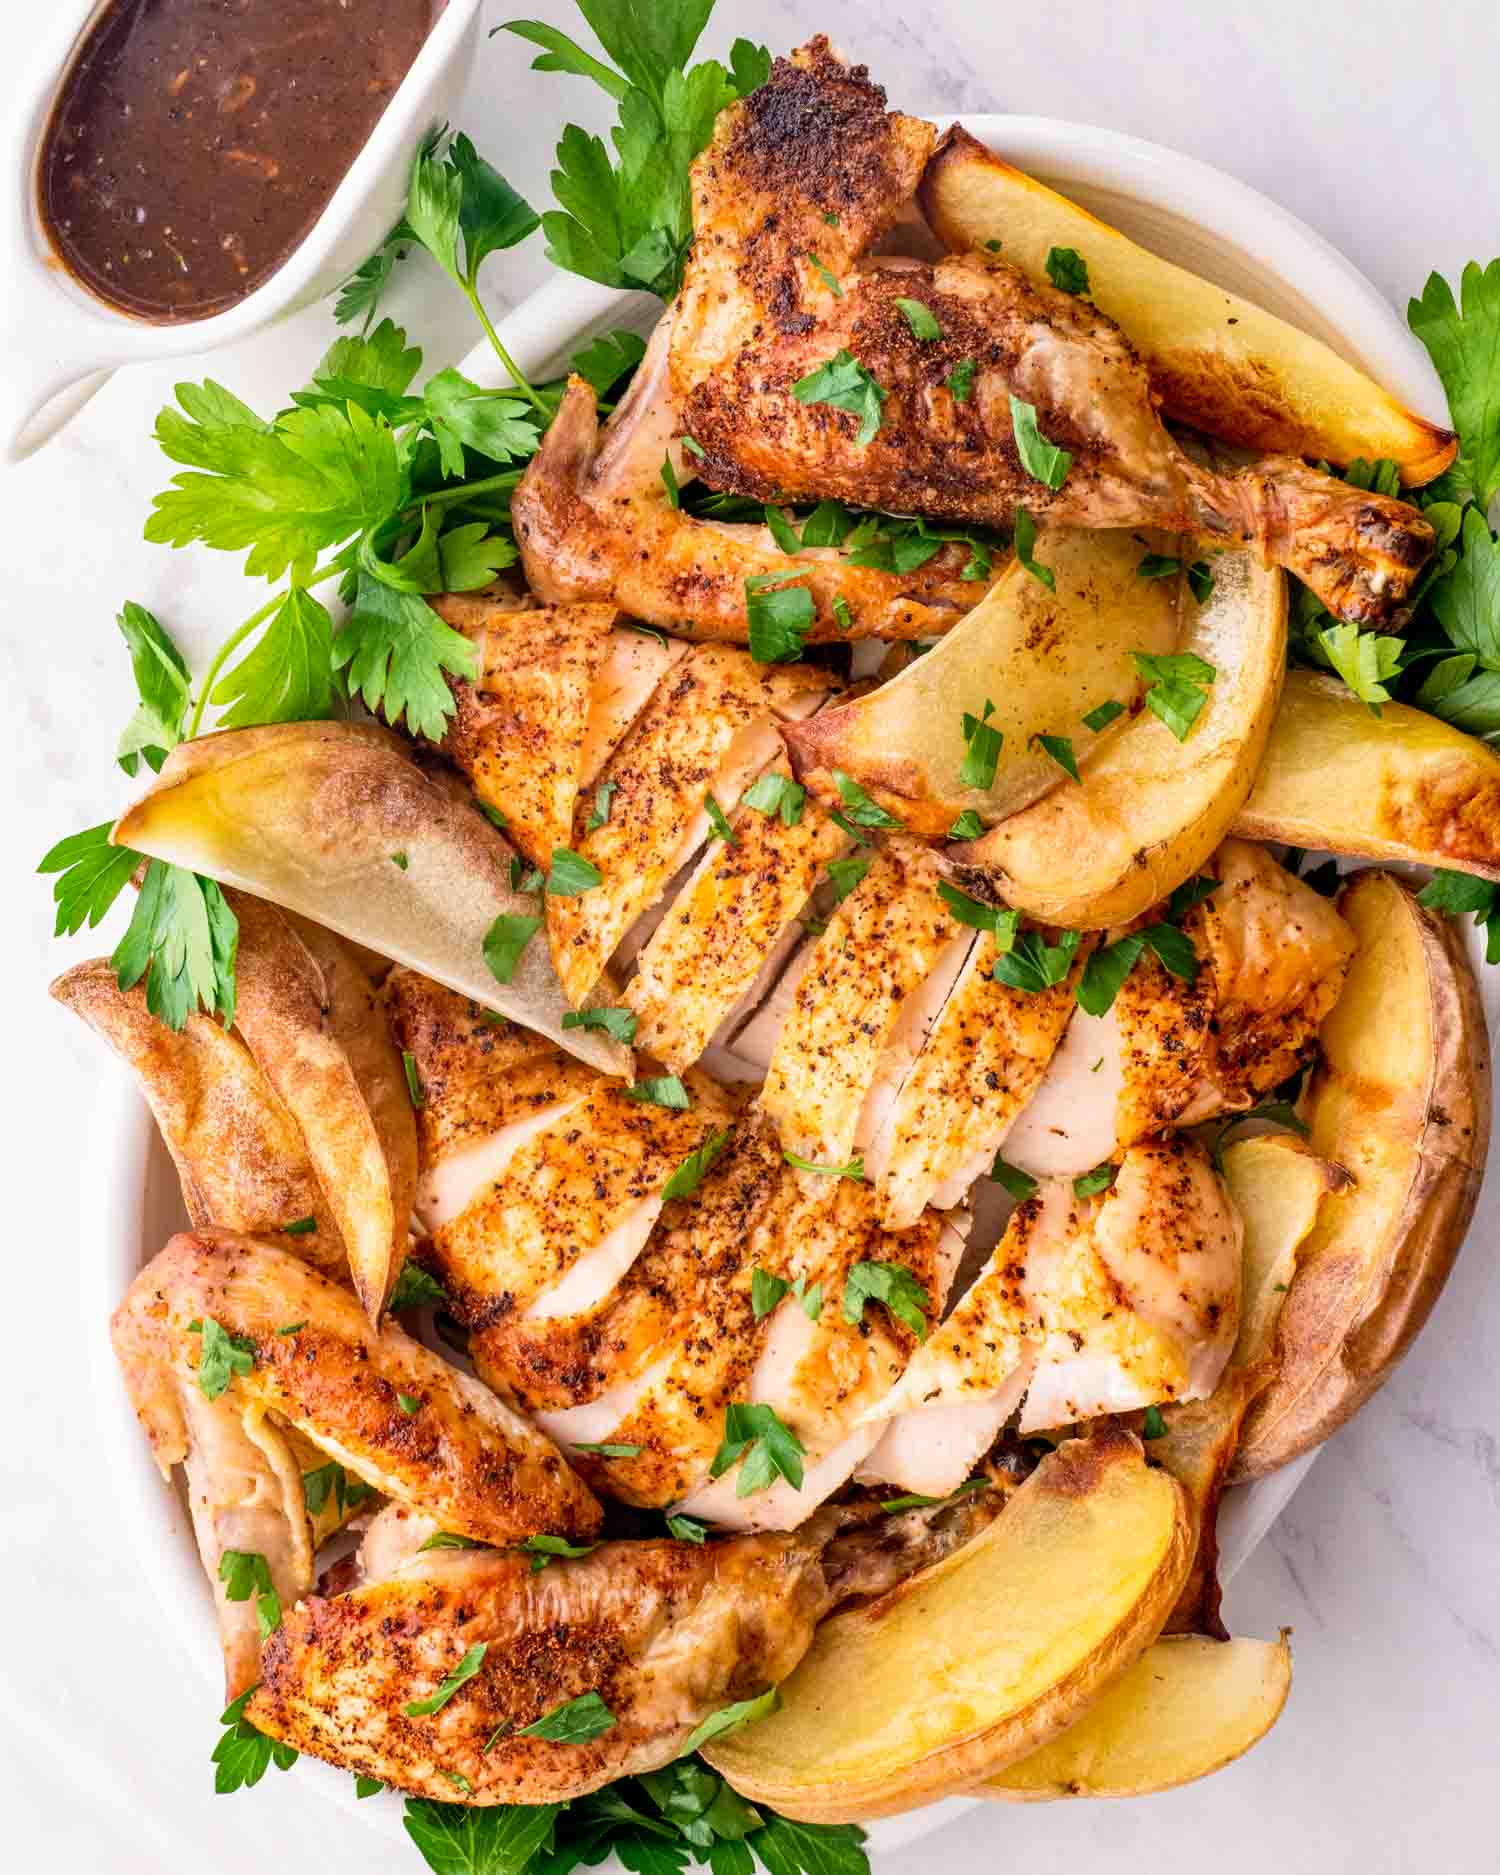
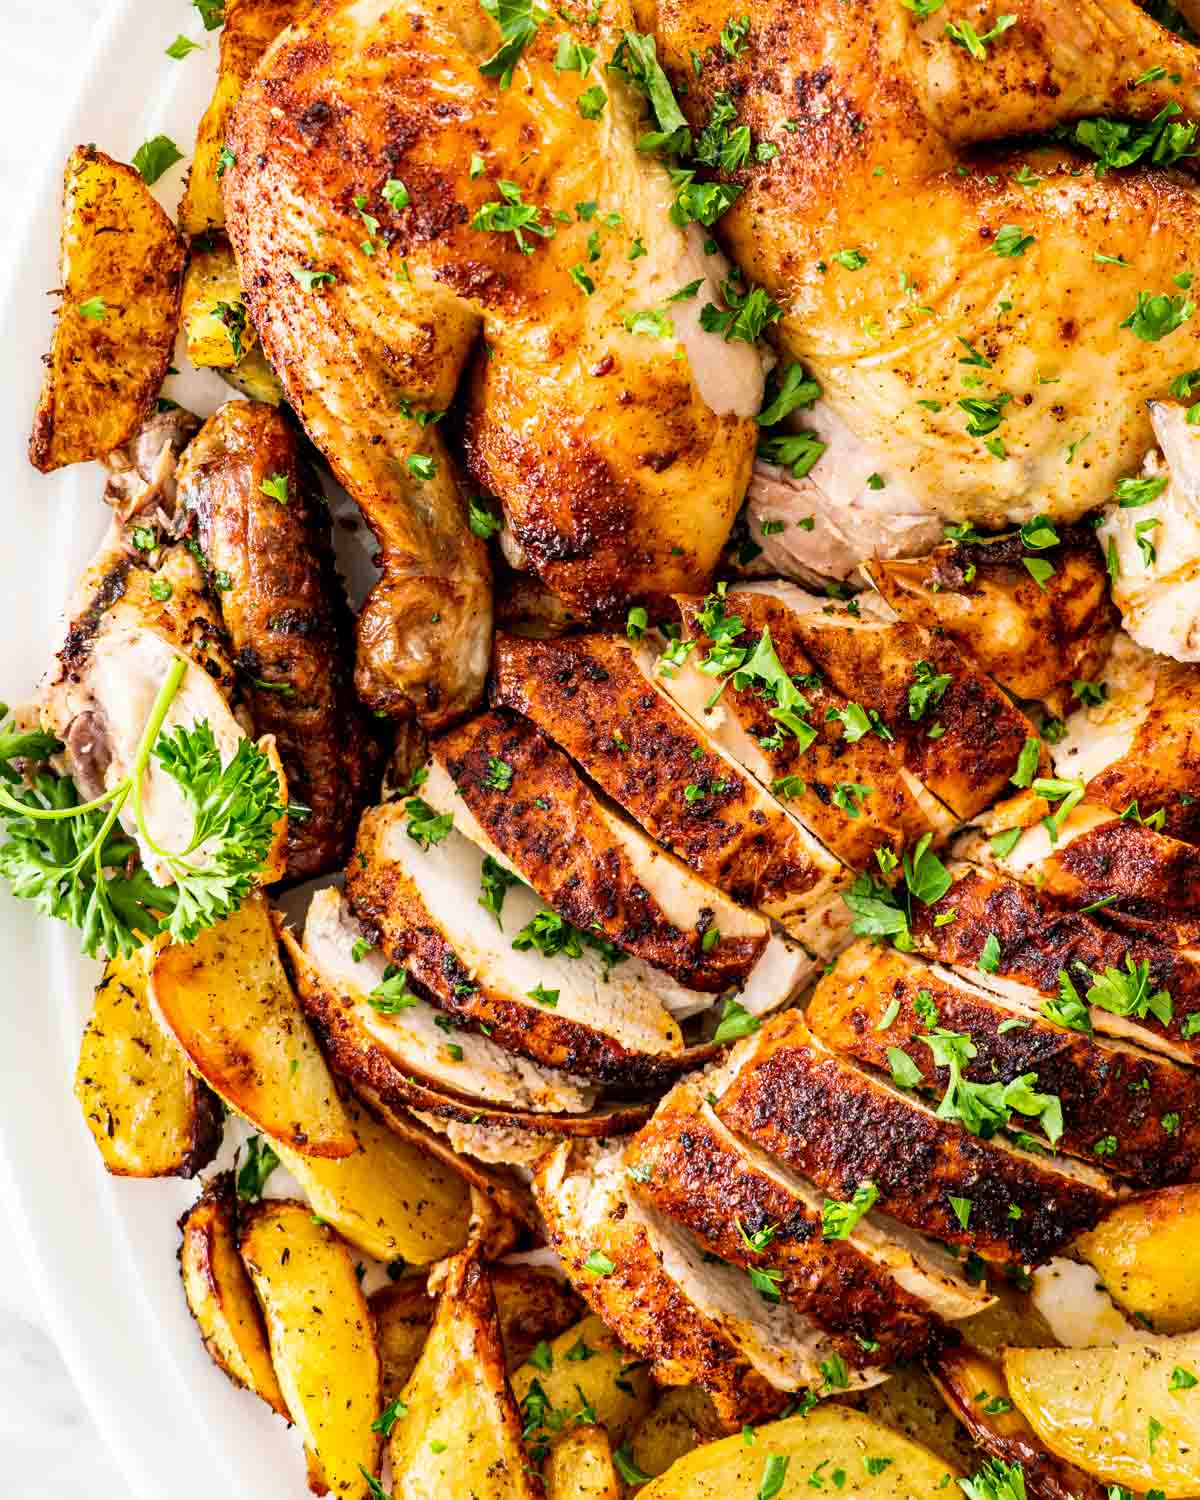
Once the chicken has rested, garnish it with a bit of freshly chopped parsley. Then slice the chicken and serve it with all your favorite sides.
How Do I Know When the Chicken Is Cooked Through?
I know you’ve seen me say this so many times before, but I can’t stress it enough; get yourself an instant read thermometer! It will change your life. You can use it for not just meats but baked goods as well.
I like to take the temperature both at the thickest part of the breast, and at the thickest part where the drumstick and thigh meet the breast. Once the meat registers at 165°F, the chicken is all done.
How To Make Chicken Gravy
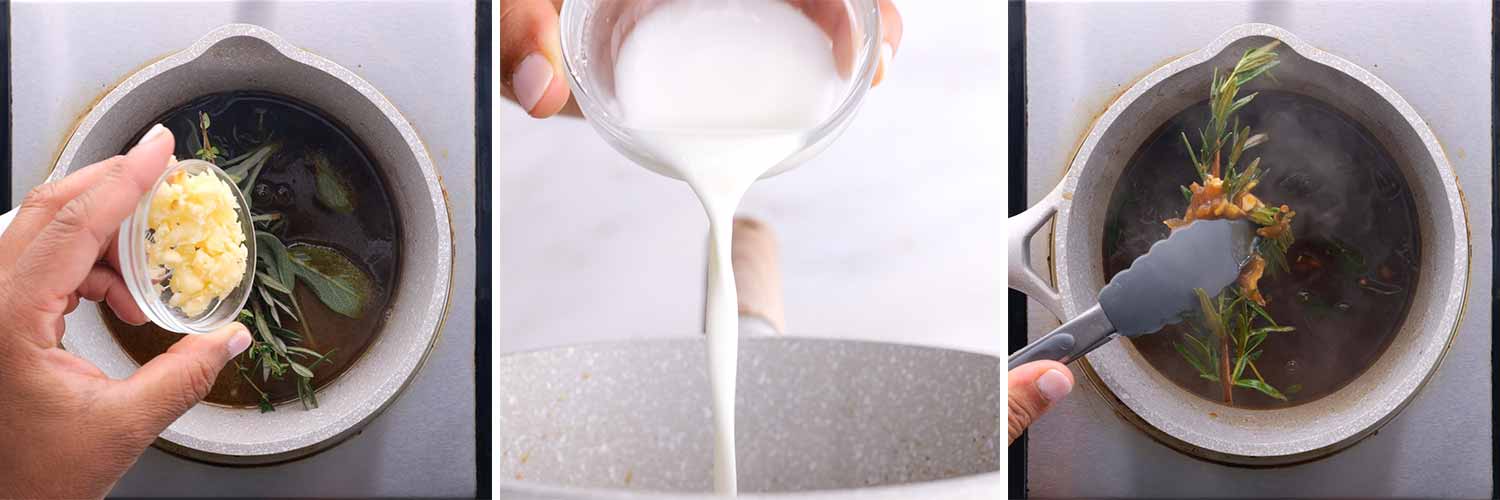
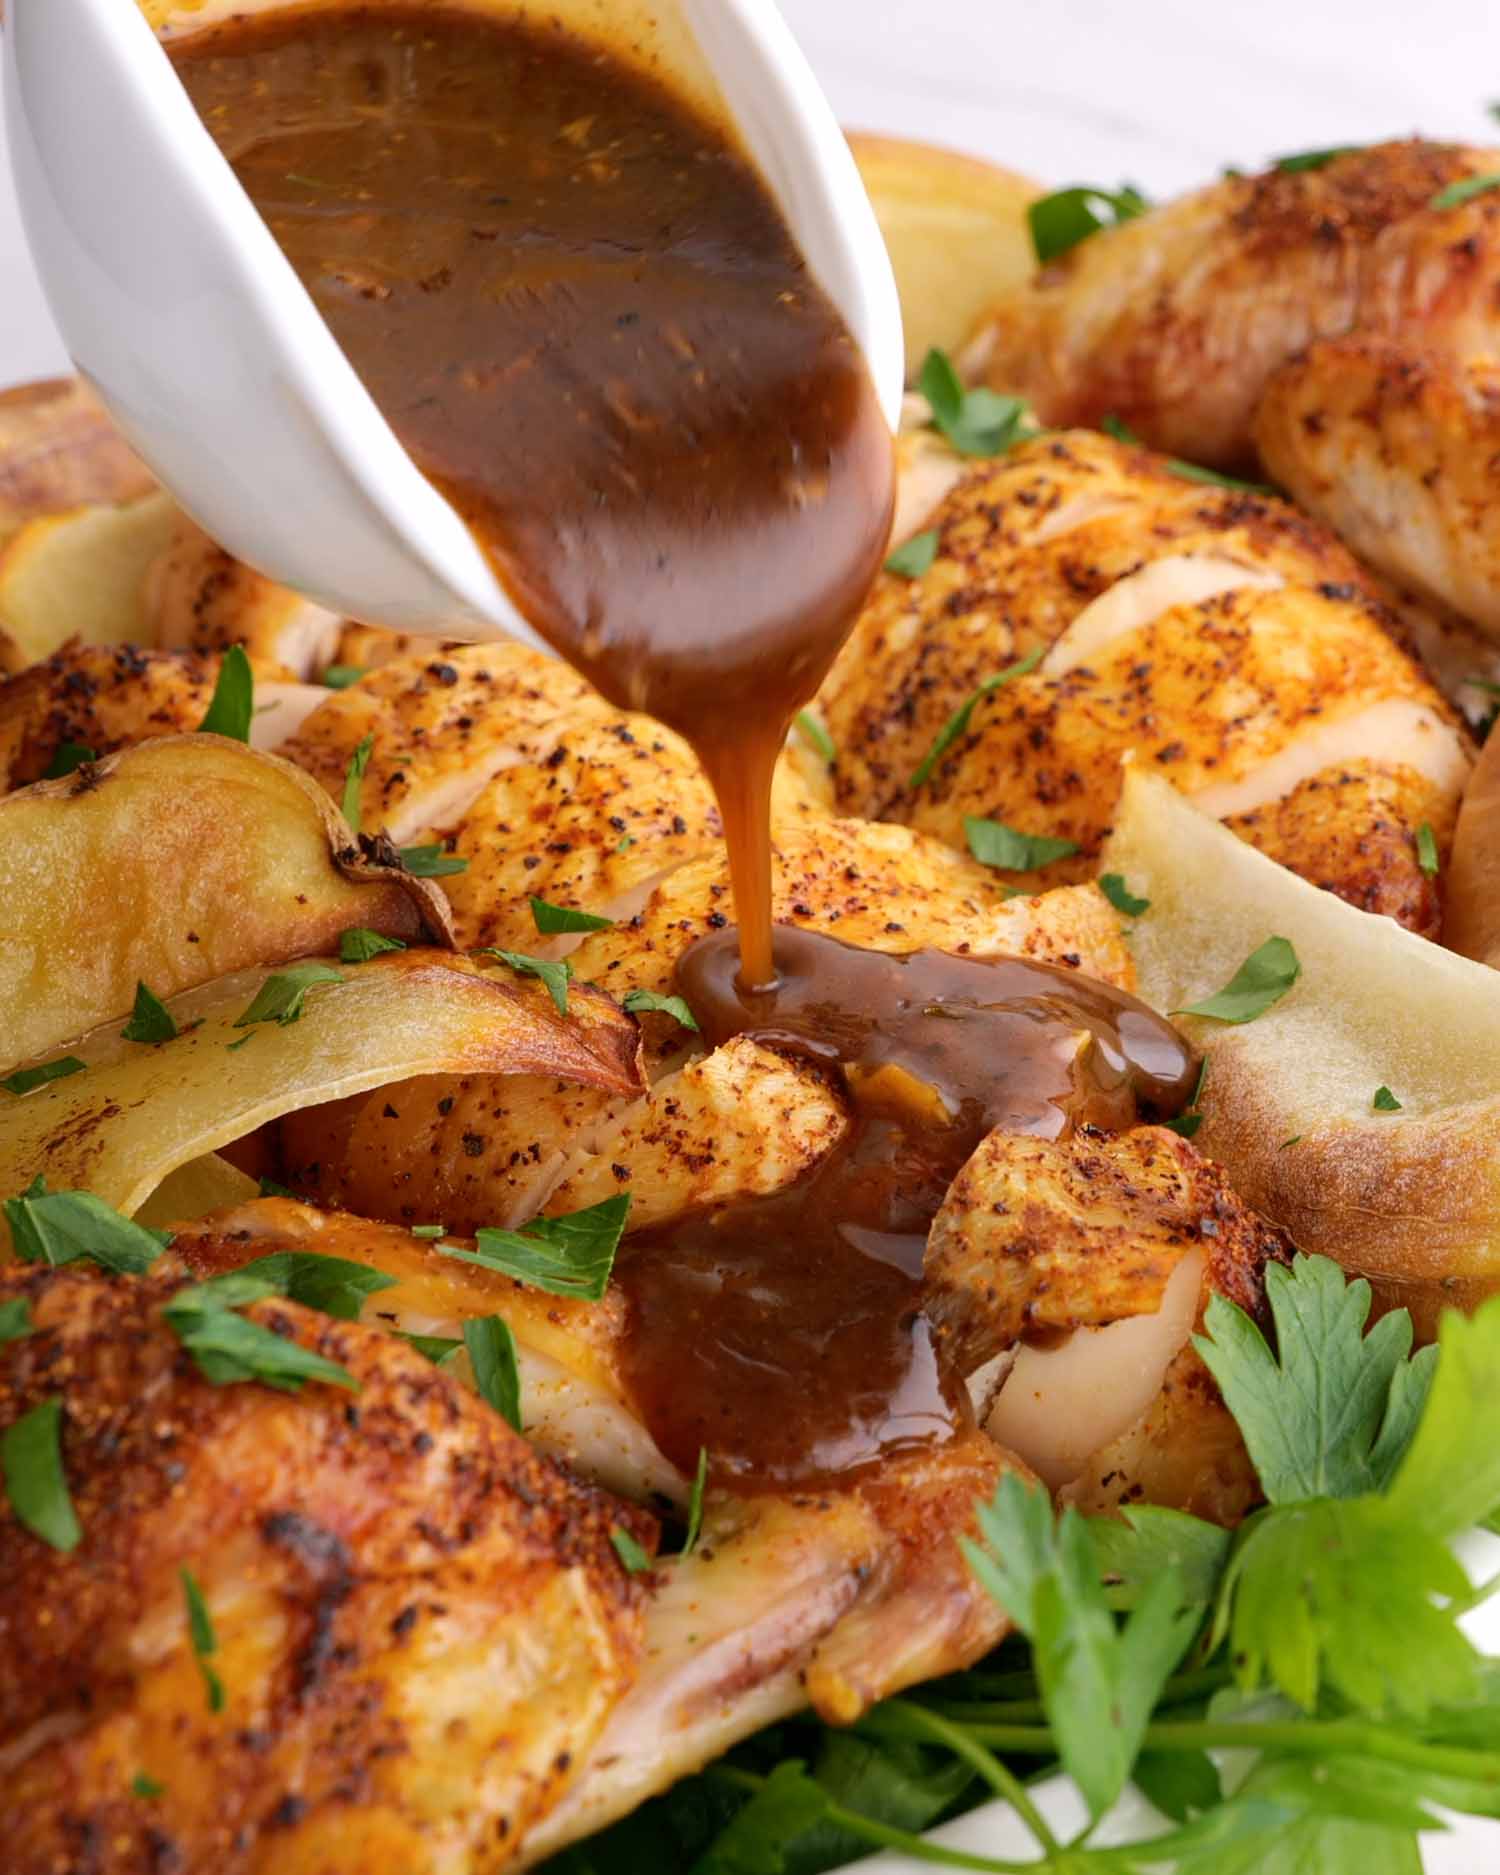
We can’t let all those flavorful drippings go to waste, can we? This is a super easy way to make a gravy so delicious you’ll want to smother your chicken and all your sides with it.
- If you want to end up with gravy for this chicken, add about ½ – 1 cup chicken stock to the roasting pan before popping it in the oven to catch all those drippings.
- While your chicken is resting, pour the drippings into a measuring cup and skim the fat off the top using a spoon. Add the drippings to a saucepan and simmer over medium high heat. You can add some herbs or garlic at this point if you’d like.
- Make a cornstarch slurry (1 tablespoon cornstarch and 1 tablespoon water) to the pan and whisk until everything thickens. You can add more or less of the slurry depending on how thick you’d like the gravy.
- Remove the herbs (if you added them), season with salt and black pepper to taste, pour into a gravy boat, and serve.
How To Carve A Roast Chicken
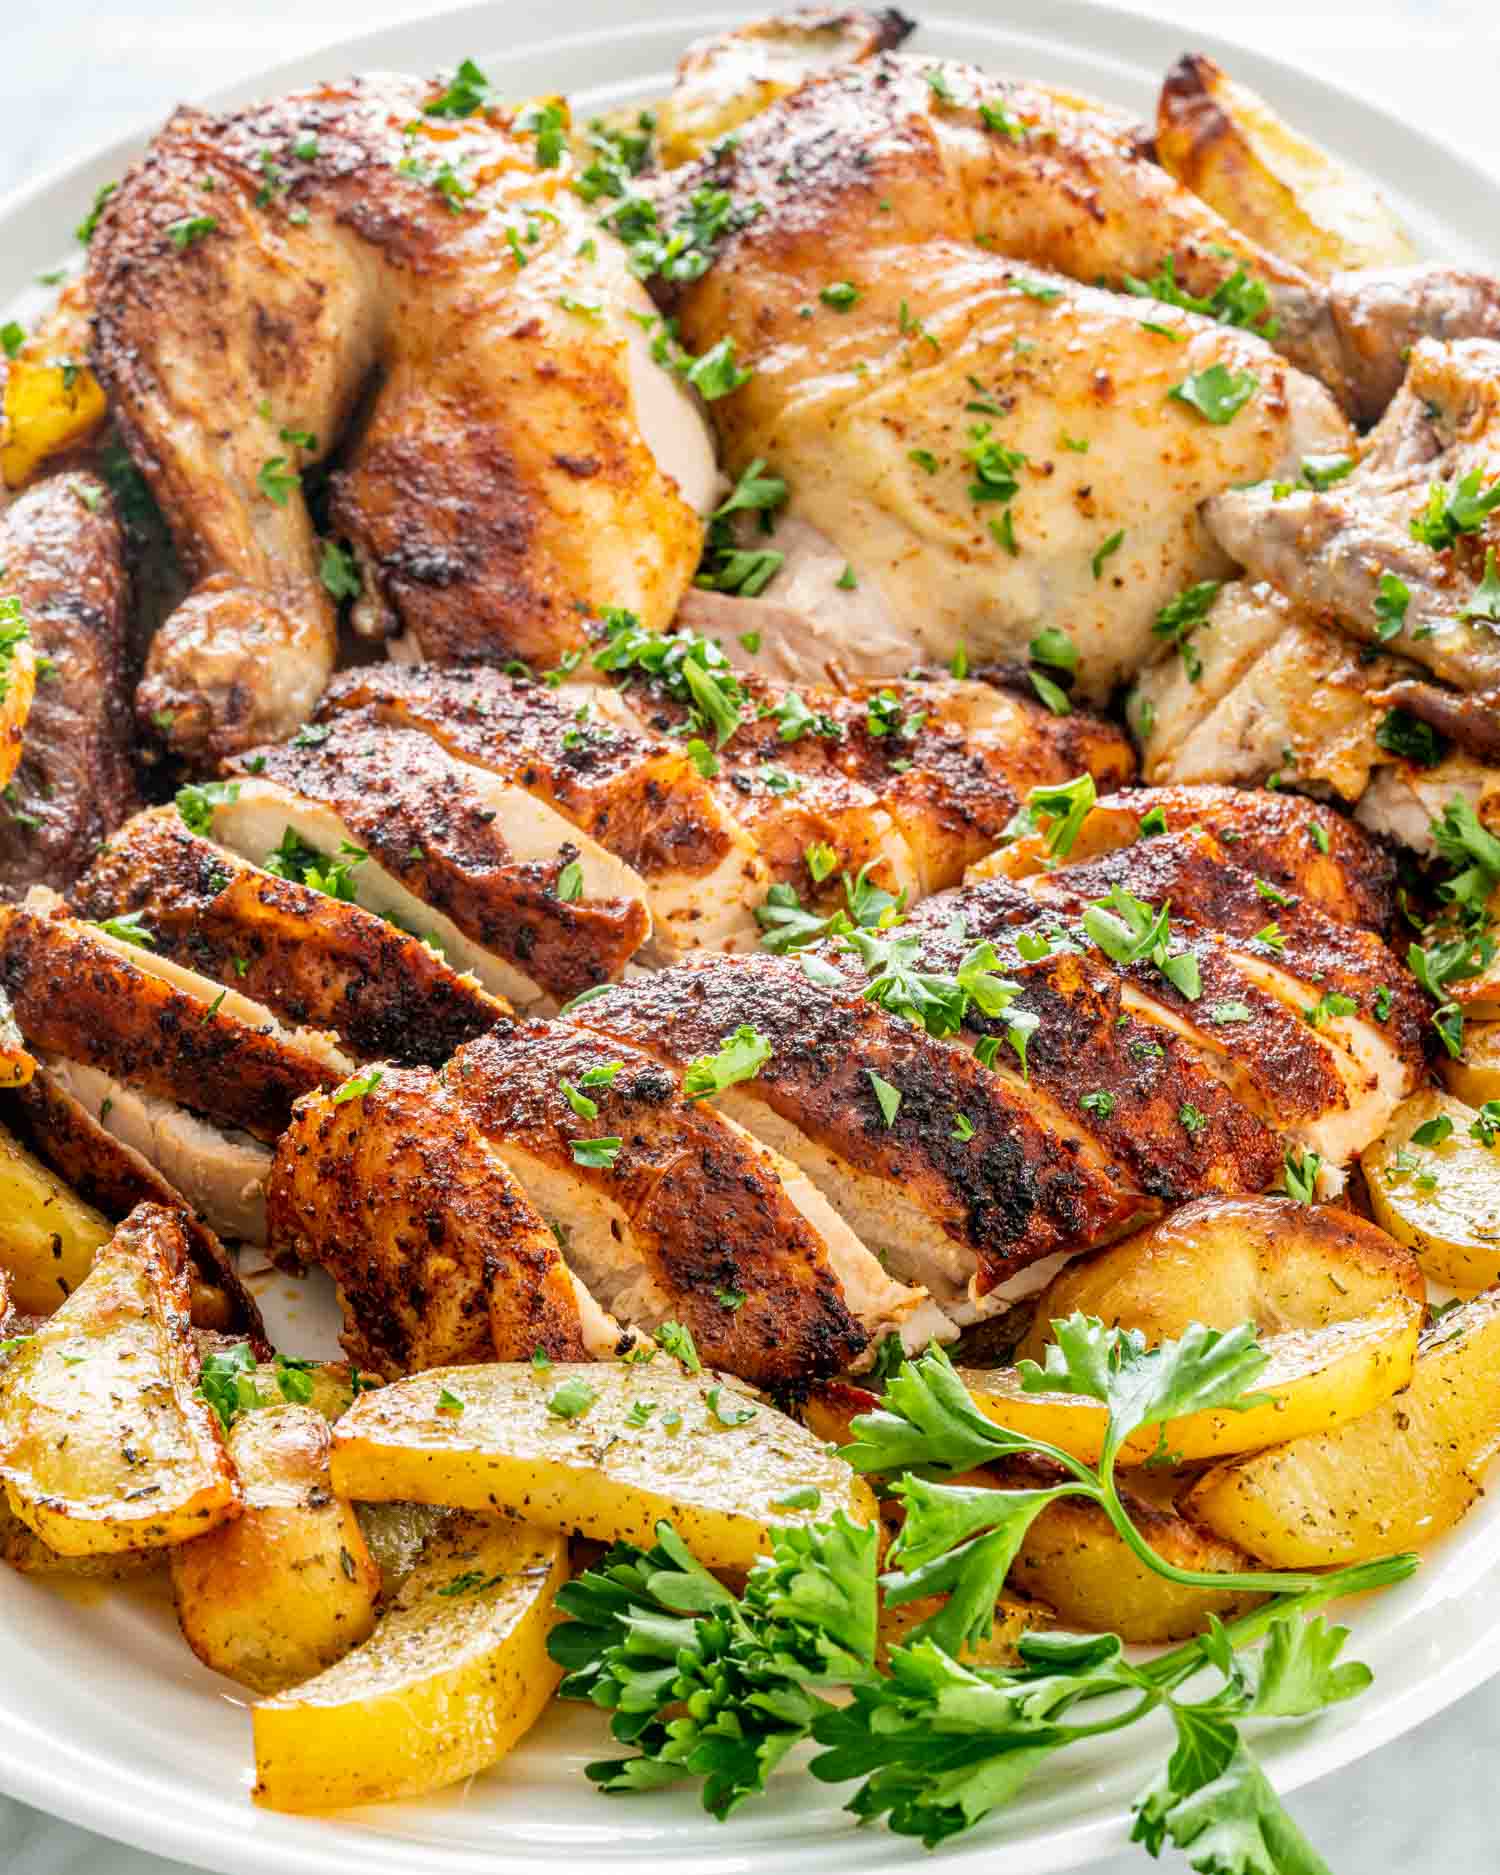
- Use a carving knife or a long chef’s knife. Start by slicing where the leg meets the body. Move the leg to the side as much as you can, then slice through the hip joint. Repeat on the other leg.
- Turn the legs over and slice through the joint between the drumsticks and the thighs.
- Look where there’s a line going down the middle of the breast- that’s the breastbone. Place your knife just slightly to the side, and slice. Follow the breast meat until it is fully sliced off.
- You can either pull the wings off, or use your knife to cut them off at the joint. Place all the pieces of meat on a platter, garnish with herbs, and serve.
What Is The Difference Between Roasting And Baking
I get asked this question a lot. Roasting and baking are pretty much the same, the only difference being the temperature used when cooking. Roasting is done at a much higher temperature than baking. Baking is usually done at a temperature of 375°F or lower and is often for food that is not solid before being cooked like any baked goods; cakes, cookies, breads, etc.
Roasting is done at a temperature of 400°F or higher and is most often used on foods that require longer cooking times. Think meats such as roasts that require a crispy skin with a soft or juicy center.
What To Serve With Roast Chicken
This wonderful recipe will go well with any of your favorite sides! You can try some potato wedges like you see in the photos, or you can check some of these recipes out:
Expert Tips
- You can gently lift the skin from the meat with your hands and rub extra seasoning or a compound butter underneath if you’d like for an extra pop of flavor.
- Don’t be afraid to get messy! Using your hands is the best way to ensure every crack and crevice has been seasoned.
- Don’t skip the increase of heat to 450°F for the last 20 minutes. This will give you extra crispy skin.
- Notice how I don’t use any oil? I find the skin crisps up so well on its own. It also holds onto the seasoning much better rather than have it drip off with added oil.
- If you have some extra fresh herbs that you want to use up, you can stuff them inside the chicken along with a lemon wedge or two.
How To Store Leftovers
Transfer the leftovers to an airtight container in the fridge and store up to 4 days. The gravy will last in the fridge, covered, for 2 days, or 1 week if you bring it to a full boil before serving.
To freeze your leftovers, I would shred the remaining chicken and store in an airtight container. You can also store the chicken in individual sized containers for easier thawing. It will last up to 4 months. Thaw either in the microwave or in a skillet over medium heat with a splash of chicken broth.
More Incredible Roast Chicken Recipes To Try
Before You Begin! If you make this, please leave a review and rating letting us know how you liked this recipe! This helps our business thrive & continue providing free recipes.
Roast Chicken
Learn how to make the best Roast Chicken recipe! Fear not with this simple rotisserie-style spice blend and step-by-step instructions that will give you juicy and flavorful chicken with perfectly crisp skin every time.
Before You Begin! If you make this, please leave a review and rating letting us know how you liked this recipe! This helps our business thrive & continue providing free recipes.
Instructions
-
Preheat the oven to 350°F. Mix all onion powder, garlic powder, smoked paprika, salt, and pepper in a small bowl.
-
Before seasoning the chicken, make sure you pat it dry using some paper towels. This ensures our spice rub will stick to the chicken. If you prefer, now is the time to cut the wing tips off the chicken. Use your hands to coat the chicken in the spice mixture. Make sure to get the seasoning inside the chicken as well! You can also rub a bit of olive oil over the chicken, once it’s been seasoned, it could help crisp up the skin. However, I find, that because we roast it at a high temperature for the last few minutes, the skin crisps up enough without the extra olive oil.
-
If you want now’s the time to add some potato wedges to the roasting pan to roast along with the chicken. You can also add other vegetables. Sometimes I add onion which I like to cut it up in quarters and some carrots as well. Bake in a roasting pan and on a roasting rack for 20 minutes per lb. Increase the heat to 450°F for the last 20 minutes to crisp the skin. Let it rest for 10-15 minutes, carve, and serve.
Notes
- The chicken is done when an instant read thermometer inserted in the thickest part of the breast, and in the thickest part where the drumstick and thigh meet the breast, registers at 165°F.
- You can gently lift the skin from the meat with your hands and rub extra seasoning or a compound butter underneath if you’d like for an extra pop of flavor.
- Don’t be afraid to get messy! Using your hands is the best way to ensure every crack and crevice has been seasoned.
- Don’t skip the increase of heat to 450°F for the last 20 minutes. This will give you extra crispy skin.
- Notice how I don’t use any oil? I find the skin crisps up so well on its own. It also holds onto the seasoning much better rather than have it drip off with added oil.
- If you have some extra fresh herbs that you want to use up, you can stuff them inside the chicken along with a lemon wedge or two.
- Transfer the leftovers to an airtight container in the fridge and store up to 4 days. The gravy will last in the fridge, covered, for 2 days, or 1 week if you bring it to a full boil before serving.
- To freeze your leftovers, I would shred the remaining chicken and store in an airtight container. You can also store the chicken in individual sized containers for easier thawing. It will last up to 4 months. Thaw either in the microwave or in a skillet over medium heat with a splash of chicken broth.
Nutrition Information
Serving: 1servingCalories: 317kcal (16%)Carbohydrates: 1gProtein: 27g (54%)Fat: 22g (34%)Saturated Fat: 6g (38%)Cholesterol: 109mg (36%)Sodium: 297mg (13%)Potassium: 290mg (8%)Fiber: 1g (4%)Sugar: 1g (1%)Vitamin A: 460IU (9%)Vitamin C: 3.1mg (4%)Calcium: 16mg (2%)Iron: 1.4mg (8%)
Notice: Nutrition is auto-calculated for your convenience. Where relevant, we recommend using your own nutrition calculations.



More Stories
Best Non Alcoholic Beer – A Couple Cooks
Chân bàn sofa bàn trà kệ tủ GP11
My Favorite Pumpkin Recipes – Kalyn’s Kitchen