
Candy Cane Cookies are a cookie perfect for Christmas! Made with a simple cookie dough that is dyed and twisted together to form the classic shape of candy canes, these festive cookies are buttery, tender, and perfectly delicious.

Baking Christmas cookies with my family and friends is one of my most cherished childhood memories. My mom, sisters, and close family friends would gather together during the holidays and bake ALL DAY long. While the cookies varied by year, the four must-make cookies that always made our baking list were Neiman Marcus Cookies, Cut-Out Sugar Cookies, and these Candy Cane Cookies.
This recipe for Candy Cane Cookies has been adapted slightly from the recipe my mom has in her recipe box. Her recipe called for a mixture of shortening and butter, but I prefer avoiding shortening whenever possible, so I have modified the original candy cane cookie recipe to use all butter in place of the shortening–but don’t worry, they still hold their candy cane shape!
The one thing that I did leave the same, is that these Candy Cane Cookies are not flavored with peppermint extract like many other recipes. I am not sure if my mom omitted the peppermint extract on purpose or on accident, but I LOVE the simplicity of flavor of these cookies. They remind me of classic shortbread cookies and can and should be dipped in a cup of milk, coffee, hot chocolate, tea, or latte.
So while the flavor remains simple in that the cookies are buttery and just sweet enough, the design of these cookies is what makes them so festive! The dough is dyed and swirled into candy cane shapes, for an absolutely adorable Christmas cookie.
Similar to a cut-out sugar cookie, these cookies are more time-consuming than a simple drop cookie, but the results are worth it and they are fun to make–kids especially love helping to shape these cookies. Candy Cane Cookies are festive and the memories of making these cookies with people you love are sure to be sweet!
Notes On Ingredients
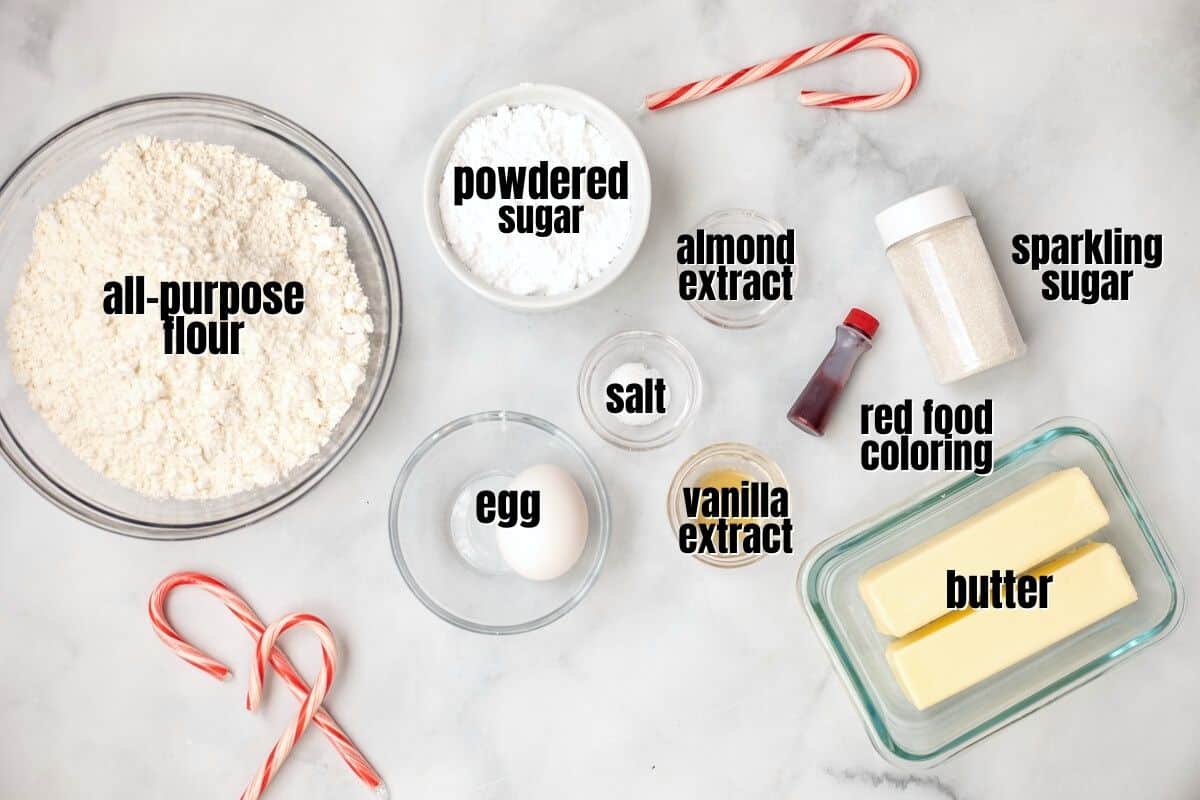
- Butter: Be sure to unsalted butter for these cookies, to control the level of salt yourself. You also want your butter to be at room temperature so that it creams easily into the batter.
- Red Food Coloring: You can use either gel or liquid red food coloring to achieve the classic red dough for the candy cane braid. I opt to purchase all-natural red food coloring, but any variety will work.
- Extract: I use both almond and vanilla extract, just as I do in my sugar cookie recipe. This gives the cookies a nice sweet, nutty flavor.
- Sparkling Sugar: I love finishing the cookies with a bit of coarse sugar. You can use clear or red, or a combination of the two. The sparkling sugar adds a nice sweet crunch to the cookies, but it is totally optional.
How to Make Candy Cane Cookies
Again these Candy Cane Cookies are not difficult to make, but you do need to account for time to chill the dough thoroughly and time to shape the cookies.
Step One: Prepare Cookie Dough
- In a large mixing bowl or bowl of a stand mixer, cream the butter on medium-high speed until light and fluffy.
- Once fluffy, add in the egg, salt, vanilla, and almond extract and beat again to incorporate.
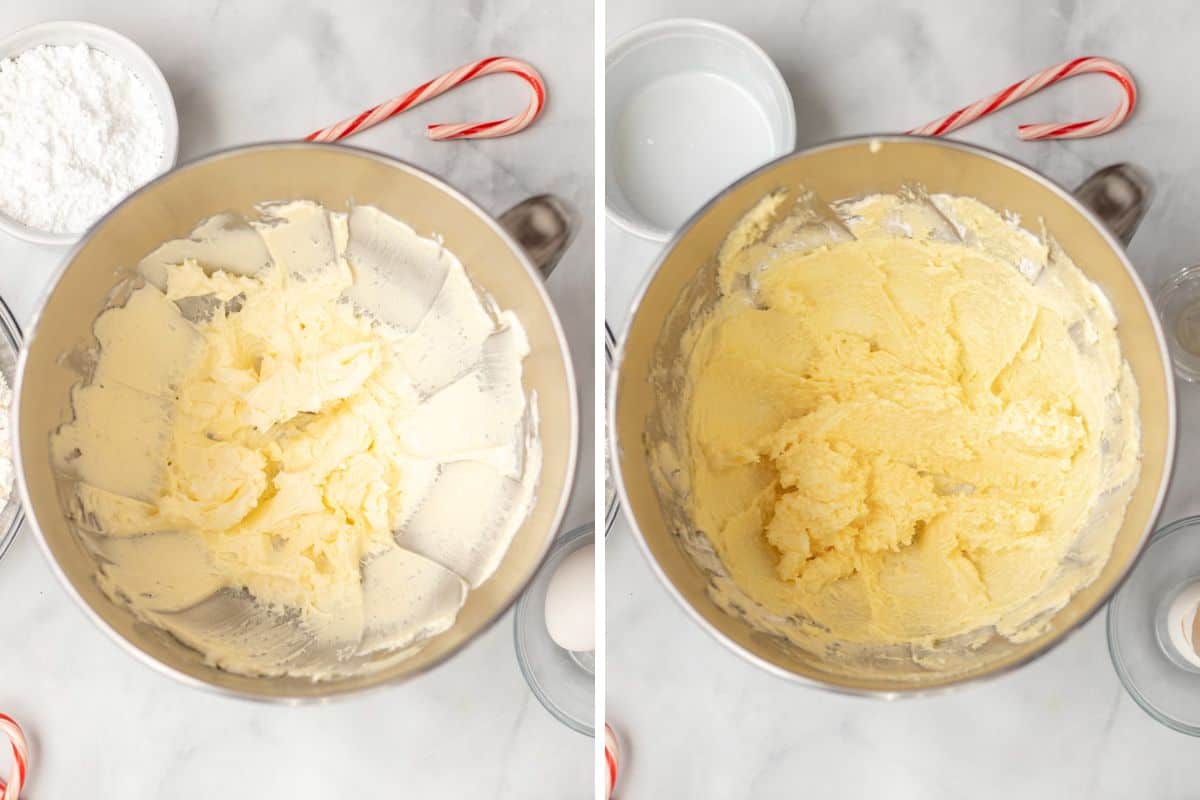
- Add the flour to the wet ingredients and mix on low speed until the flour is JUST combined. Don’t overwork the dough or you will end up with a tough cookie.
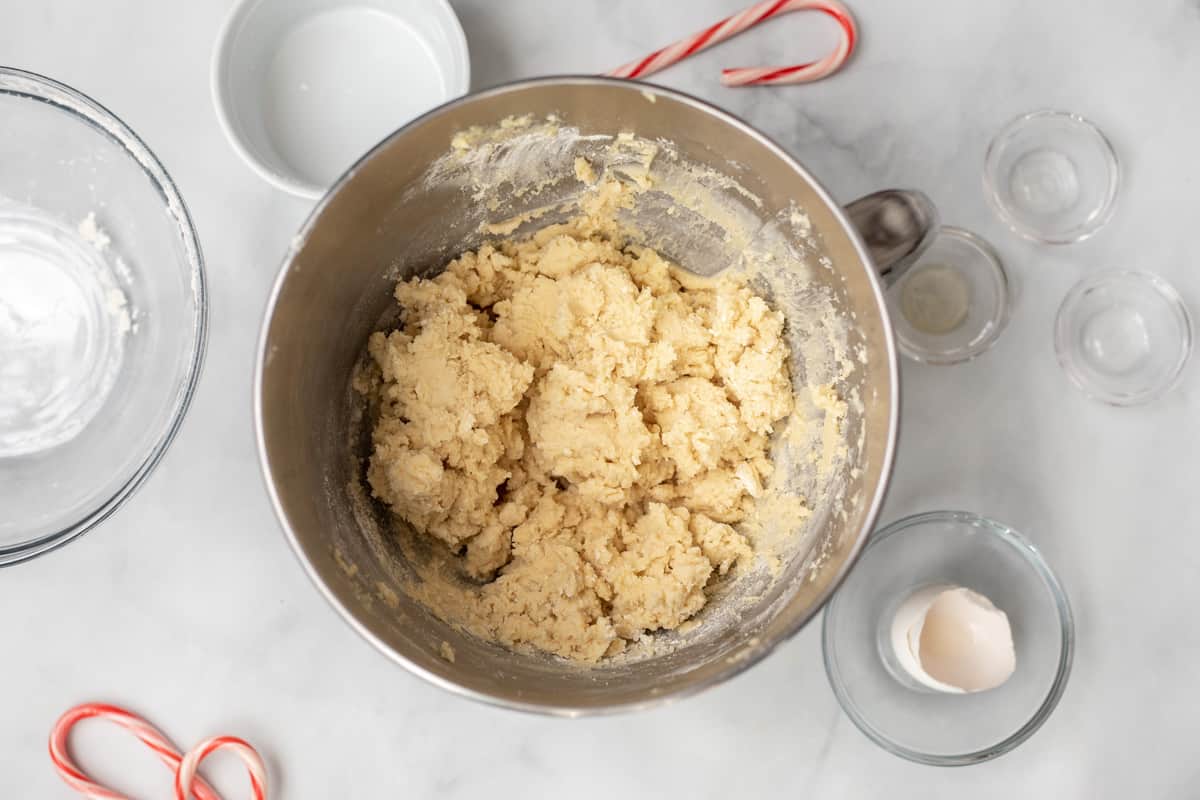
Step Two: Dye the Dough
In order to achieve the red and white striped aesthetic of a classic candy cane, half the dough needs to be dyed a vibrant red color.
- Divide the dough in half and remove half the dough from the mixing bowl.
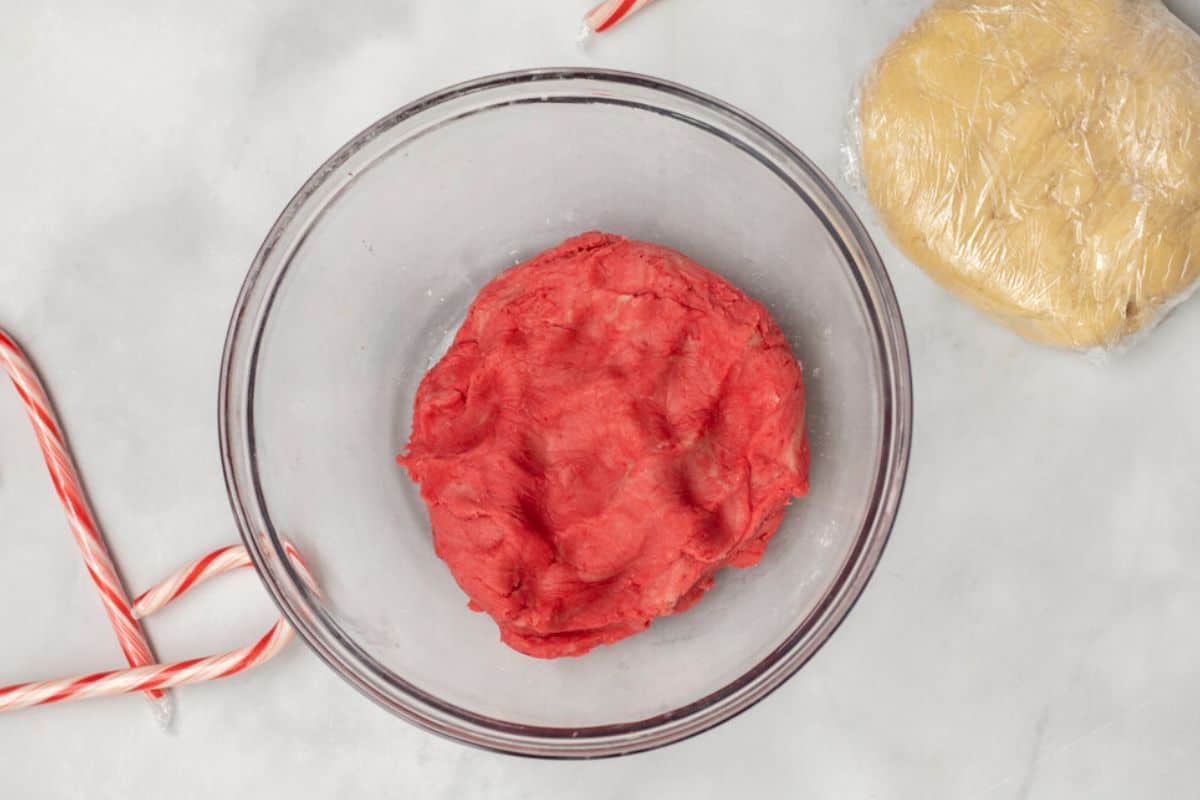
- To the remaining dough left in the bowl, add several drops of red food coloring. Fold the food coloring into the dough, using a spatula or your hands. I loved mixing by hand as a child and watching the dough magically change colors.
- If needed add additional food coloring until the dough is a bright, vibrant red.
Step Three: Chill
The dough will be much easier to shape once fully chilled. The chilling will also help prevent the cookies from spreading and hold their shape when baked.
- Pat each half of the dough into circles about 1 inch thick and wrap each disk in plastic wrap.
- Refrigerate the cookie dough for at least 2 hours.
Step Four: Shape
Once your dough is fully chilled, now the fun begins! If you have willing helpers, now is the time to put them to work to help you shape the candy cane cookies and make some memories in the process.
- Cut off about ½ tablespoon of dough from each disk of dough.
- Roll each into a thick rope about 5 inches long. I like to place the disks of dough next to each other before shaping the candy canes so that you ensure they are the same length. And it helps to use your palm instead of your fingers to keep the log even in shape.

- Pinch the tops of the ropes together (this helps them stick together) and twist them together, curving the top of the dough into a candy cane shape.
- Place onto a parchment-lined baking sheet and repeat the process until no dough remains.

Step Five: Chill Again
In order for the candy cane cookies to hold their classic shape and not turn into blobs, it is crucial to chill the dough again once the cookies are shaped.
- Place the baking sheet into the refrigerator and chill for 15-30 minutes before baking. I typically use this time to preheat the oven. When the oven has fully preheated the cookies will be thoroughly chilled.
Step Six: Bake
- Remove the cookies from the refrigerator and sprinkle the sparkling sugar over the cookies.
- Bake the cookies until just beginning to turn a light golden on the bottom. You don’t want to overbake the cookies, they will continue to set up as they cool.

- Remove the cookies from the oven and let them sit on the baking sheet for 10 minutes. This gives the cookies time to set up and be less fragile.
- After 10 minutes, remove carefully remove the cookies from the baking sheet and let them cool fully on a wire cooling rack.
- Serve with milk, coffee, tea, or hot chocolate.

Storage Instructions
Candy Cane Cookies can be stored in an airtight container for up to one week at room temperature after they have cooled completely.
If desired, you can freeze these cookies for up to 1 month. I highly recommend freezing the candy cane cookies in a freezer-safe container rather than a freezer-safe bag, as the delicate shape can easily be broken if tossed too much in the freezer.
Peppermint Candy Cane Cookies
While I personally prefer Candy Cane Cookies to be made without the addition of peppermint extract, you can certainly opt to add peppermint extract to these cookies for a kick of peppermint flavor.
- Omit the almond extract and replace it with ½ teaspoon of peppermint extract to the cookie dough when you add the vanilla extract to the batter. Peppermint extract is very strong, so you don’t want to go overboard and add too much, or your cookies may end up tasting like toothpaste.
- If desired, sprinkle the cookies with ½ cup of crushed candy canes. Not only does this add a festive touch, but it indicates the flavor of the cookies. Just be sure to sprinkle the crushed candy canes over the cookies as soon as you remove them from the oven, as that will help the crushed candy adhere to the cookies.
More Festive Christmas Recipes
If you enjoyed this Candy Cane Cookie Recipe, I would love for you to leave a review and comment below.

Candy Cane Cookies
Made with a simple cookie dough that is dyed and twisted together to form the classic shape of candy canes, these festive cookies are buttery, tender, and perfectly delicious.
Print
Pin
Rate
Servings: 36 cookies
Calories: 99kcal
Prevents your screen from going dark while preparing the recipe.
Instructions
-
In a large mixing bowl or bowl of a stand mixer, cream the butter on medium-high speed until light and fluffy.
-
Scrape down the sides of the mixing bowl, then add in the egg, powdered sugar, vanilla extract, almond extract, and salt. Beat again on medium speed until everything is fully incorporated.
-
Add the flour to the creamed ingredients, and mix on low speed until JUST incorporated, scraping down the sides of the bowl if needed.
-
Divide the dough in half and remove half the dough from the mixing bowl. Add ½ teaspoon of red food coloring to the remaining dough left in the mixing bowl. Fold the food coloring into the dough, using a spatula or your hands until the dough is evenly dyed. If needed add up to ½ teaspoon of additional food coloring until the dough is a bright, vibrant red.
-
Pat each half of the dough into 1-inch thick disks and wrap well in plastic wrap. Refrigerate for at least 2 hours or up to 3 days to fully allow the cookie dough to chill.
-
When ready to shape the cookies, line two large baking sheets or cookie sheets with parchment paper.
-
Cut off about ½ tablespoon of dough from each disk of dough, so that you have both a red and white section of dough. Roll each into a thick rope about 5 inches long, ensuring that each log of dough is the same length. Pinch the tops of the ropes together and twist them together, curving the top of the dough into a candy cane shape. Place the shaped candy cane cookie onto the parchment-lined baking sheet, spacing the cookies 2 inches apart. Repeat the process until no dough remains.
-
Place the baking sheets with the shaped cookies into the refrigerator and chill for 15-30 minutes before baking. During this time, preheat the oven to 375°F.
-
Once the oven has preheated and the cookies have chilled, remove the baking sheets from the refrigerator and sprinkle the sparkling sugar over the cookies.
-
Bake until the bottom edges are just barely starting to turn lightly golden, about 8-10 minutes.
-
Once golden, remove the cookies from the oven. Cool the cookies for 10 minutes on the baking sheet, then transfer them to wire cooling racks and cool completely.
Notes
Peppermint Flavored Candy Cane Cookies:
- Omit the almond extract and replace it with ½ teaspoon of peppermint extract to the cookie dough when you add the vanilla extract to the batter.
- Omit the sparkling sugar, and instead sprinkle the cookies with ½ cup of crushed candy canes as soon as you remove them from the oven.
Nutrition
Calories: 99kcal | Carbohydrates: 11g | Protein: 1g | Fat: 5g | Saturated Fat: 3g | Polyunsaturated Fat: 0.3g | Monounsaturated Fat: 1g | Trans Fat: 0.2g | Cholesterol: 19mg | Sodium: 35mg | Potassium: 15mg | Fiber: 0.3g | Sugar: 3g | Vitamin A: 165IU | Calcium: 4mg | Iron: 1mg




More Stories
turkey pesto meatballs and orecchiette – smitten kitchen
Zucchini Pancakes – Family Fresh Meals
Easy Braised Chicken Thighs • Loaves and Dishes